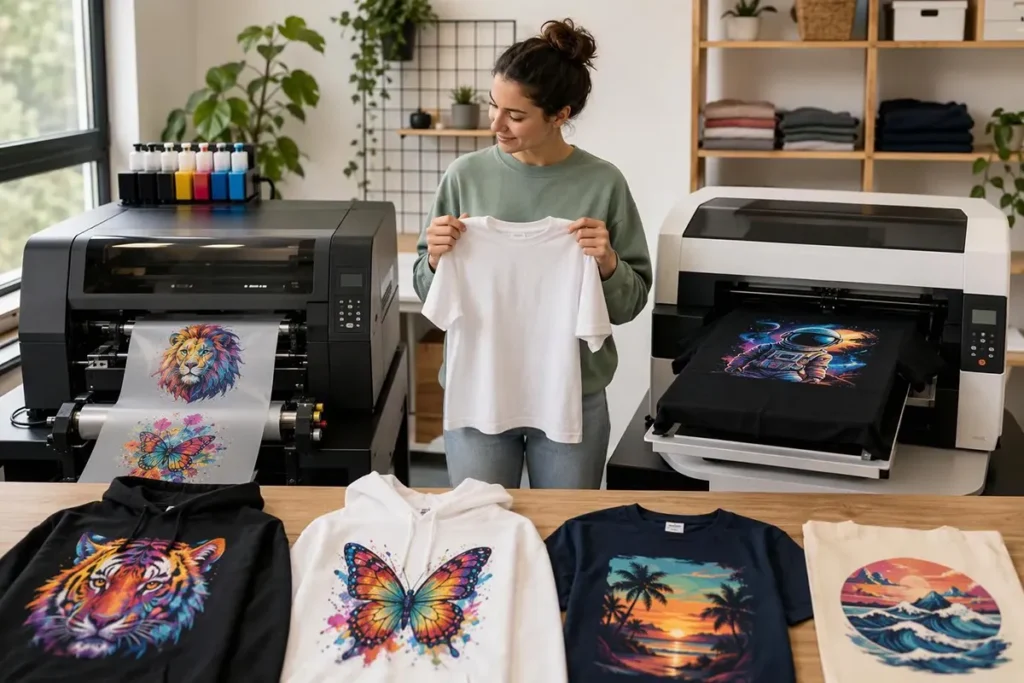
Using DTF transfer film starts with a compatible printer and the correct printable face. Print the mirrored design, apply powder while the ink is wet, cure the transfer, then heat-press it onto the garment and peel the carrier at the film’s specified stage. The loading direction and peel instructions belong to the exact film, not to every product labeled “DTF.”
Check the film before changing the press. A design that smears during printing or distorts during feeding already has a problem before it reaches a garment.
This guide covers conventional textile DTF film. UV DTF A/B films for hard-surface decoration use a different process and are not substitutes.
Start With Blank Film or a Ready-to-Press Transfer
Blank DTF film needs printing, powdering, and curing. A purchased ready-to-press transfer has already passed those stages; begin with its garment-application instructions instead of adding ink or powder.
For blank film, prepare a DTF-compatible printer, the matched ink and adhesive powder, RIP software, approved curing equipment, and a heat press. Keep the film’s product label and instructions with the material.
Epson’s film-printing equipment guidance also directs operators to the instructions for their particular film and powder. Its machine-specific loading details should not be applied to other printers.
Choose Rolls or Sheets That the Printer Can Feed
Use sheets when the printer supports sheet feeding and the job fits its usable print area. Use DTF film rolls when the printer and finishing equipment support the required continuous media path.
Media width and printable width are different measurements. A nominal film size does not mean artwork can run to every edge.
| Check | Sheets | Rolls |
|---|---|---|
| Machine compatibility | Supported sheet dimensions and loading method | Supported roll width, core, weight, and feed path |
| Artwork fit | Design plus required margins fits the usable area | Layout fits usable width and available job length |
| Handling | Keep sheets aligned, clean, and protected from curl | Load squarely and follow the approved tension and take-up procedure |
| Finishing | Provide a supported powdering and curing arrangement | Match the film path and feed rate to the powdering and curing equipment |
Choose the format around the work, rather than assuming rolls are always more economical. A continuous layout may reduce repeated loading, but film use still depends on margins, spacing, job changes, and rejected transfers.
Xinflying’s DTF supplies range provides an equipment-and-consumables starting point. Confirm the exact film specification and compatible configuration before ordering replacement stock.
Identify the Printable Face Before Loading
The printable face has the coating intended to receive ink. Identify it from the product label, packaging diagram, or supplier instructions.
A matte appearance can be a useful clue for a particular film, but it is not a universal rule. Likewise, “double-sided coating” does not establish that both faces accept a printable image; confirm what the manufacturer means.
Mark the loading direction on the storage sleeve or roll record, not across the printable surface. Keep that record with the product and batch so the next operator does not have to guess.
Handle blank film by its edges where practical. Keep dust, fingerprints, and moisture away from the print area, and separate unidentified stock from approved material.
Print, Powder, and Cure Without Losing the Film’s Identity
1. Check the design and mirror it once
Set the artwork to its intended finished size in the RIP. Check transparent areas, small text, and the white-layer preview before sending the job.
Conventional textile DTF transfers need mirrored artwork so lettering reads correctly after application. Some software mirrors automatically, so inspect the final print preview rather than flipping the file and the RIP setting twice.
Include a short word or asymmetric detail in the first trial. It provides a quick orientation check that a symmetrical logo cannot.
2. Load the film and inspect the first print
Follow the printer’s media path and loading procedure. For a roll, confirm that the film enters squarely and travels without folds or unusual slack; for a sheet, use the supported alignment and feeding method.
Use the approved DTF print mode and consumable profile. In a conventional color-and-white transfer, the color image is printed onto the film with the white backing behind it; the RIP controls the required ink layers.
Check fine lines, white-to-color alignment, and ink behavior on the first print. Pooling, smearing, or a lifted film edge is a reason to pause, rather than finish the whole roll and hope curing will correct it.
For tracking problems, our DTF film shifting and skew guide covers the transport checks in more detail. Keep mechanical adjustments within the printer’s documented procedures.
3. Apply powder while the ink can receive it
Coat the printed area evenly with the specified adhesive powder while the ink is still wet. Remove loose excess through the approved manual or automatic process without disturbing the image.
Inspect the clear film around the design as well as the printed area. Stray powder outside the artwork deserves attention before heating, because curing can turn an avoidable contamination problem into a finished-transfer defect.
Keep manual powder handling away from the printer’s exposed mechanisms. Follow the consumable’s safety data sheet and the equipment’s dust-control and ventilation instructions.
4. Cure with the matched process
Use the curing arrangement approved for the film, powder, and equipment. Record its settings and the actual exposure or conveyor conditions.
Curing powder and pressing a garment are separate heating stages. Copying a press temperature into a curing oven does not establish a suitable curing recipe.
Appearance can help flag an abnormal sample, but a glossy surface alone does not prove that the transfer is ready. Confirm the result through the specified process checks and a test application on the intended garment.
Epson’s film post-processing instructions explicitly note that the process can vary with film, powder, equipment, substrate, and ink amount. That is why one temperature-and-time chart cannot settle every combination.
Heat-Press and Peel According to the Film Type
Prepare the garment so the intended decoration area lies flat. Seams, pockets, or an uneven support surface can interfere with contact even when the press display shows the expected temperature.
Position the transfer with its printed adhesive side toward the fabric and its carrier above the design. Use the specified temperature, time, pressure, cover material, and garment-preparation sequence.
Match the release condition, not just the label
Cold peel DTF transfer film needs the cooling condition stated for that product before carrier removal. Hot, warm, and instant-peel labels refer to other release procedures; they do not share one universal waiting period.
| Film description | What to establish before the first garment |
|---|---|
| Cold peel | Required cooling condition and removal method |
| Hot or warm peel | Permitted release window after pressing |
| Instant peel | Exact removal sequence and any specified finishing step |
| Hot/cold compatible | Instructions for each supported method |
DTF films generally fall into cold, hot, hybrid, and instant-peel categories depending on the release mechanism. Recommended press settings should be calibrated specifically to the film type and material in use.
Do not turn “hot peel” into an instruction to pull every film immediately. Follow the chosen product’s direction and peeling motion, then check edges and small details.
A second press is part of some application recipes, not an automatic fix for every transfer. When required, use the specified cover and finishing conditions rather than adding extra heat by habit.
Our DTF heat-press guide explains garment application in more detail. For this film trial, keep the actual release condition with the sample.
Find the First Stage Where the Defect Appears
A damaged transfer does not automatically mean defective film. Inspect the sequence before replacing material or increasing heat.
| First visible problem | Start the investigation here |
|---|---|
| Ink pools or smears before powdering | Printable face, compatibility, print mode, and surface contamination |
| Film skews, wrinkles, or lifts during feeding | Loading, transport path, supported media, and tension procedure |
| Powder remains in clear areas | Powder application, excess removal, film condition, and handling |
| Film or artwork distorts during curing | Matched curing conditions and media handling |
| A previously acceptable design remains partly on the carrier | Application contact, press conditions, and release method |
| A defect appears only after washing | The complete transfer process and the documented wash-test conditions |
These are starting points, not diagnoses. Similar defects can have more than one cause.
Keep a reference and a trial sample
When changing film, retain a known acceptable sample and label the new trial with its film batch, ink, powder, print mode, curing conditions, garment, press settings, and peel method. Change one variable at a time within supported conditions.
Photograph the printed film, cured transfer, peeled carrier, and garment. This separates a defect already present on film from one introduced during application.
For example, distorted lettering visible before pressing points back toward printing, transport, or curing. Clear lettering before pressing but missing details afterward shifts attention to contact and release; it does not, by itself, prove that the film is faulty.
Approve the combination, not just a single attractive print. Check the intended garment and any required laundering assessment before committing the batch to customer work.
Store Blank Film and Finished Transfers Separately
Keep blank film protected in its original packaging or the specified protective storage. Preserve the product label, batch, and printable-face identification.
Cured transfers need their own handling and storage instructions. Keep their approved application recipe attached, especially when different peel types share the same work area.
Do not assign every film the same shelf life or storage range. If stored material curls, becomes contaminated, or behaves differently, inspect and recheck a sample before using the remaining stock.
FAQ
Not with ordinary office ink and settings. The printer must support a suitable DTF ink-delivery and media workflow; placing DTF film in a standard printer does not make it a DTF printer.
No universal appearance rule identifies every product’s printable face. Follow the specific film’s marking or diagram, particularly when both sides have a coating.
Neither label proves better detail, durability, or finish across all brands. Compare the approved process and finished results on the actual job, including the handling and cooling work each option requires.
Treat the used carrier as spent material, not fresh printable film. Do not send it back through the printer unless the film and equipment manufacturers explicitly support that reuse.
Use the matched film-and-powder instructions for curing, then the transfer-and-garment instructions for pressing. Those are different stages, so a single temperature without its process and material context is incomplete.
Make the Next Film Trial Repeatable
Keep one approved sample and its complete process record at the workstation. That makes a new roll, a different operator, or a release problem easier to compare with something known.
For film selection or compatibility guidance, contact Xinflying with the printer model, sheet or roll dimensions, current film, ink and powder, target garment, and the issue or result required. Those details support a specific consumables recommendation and configuration-based quote.