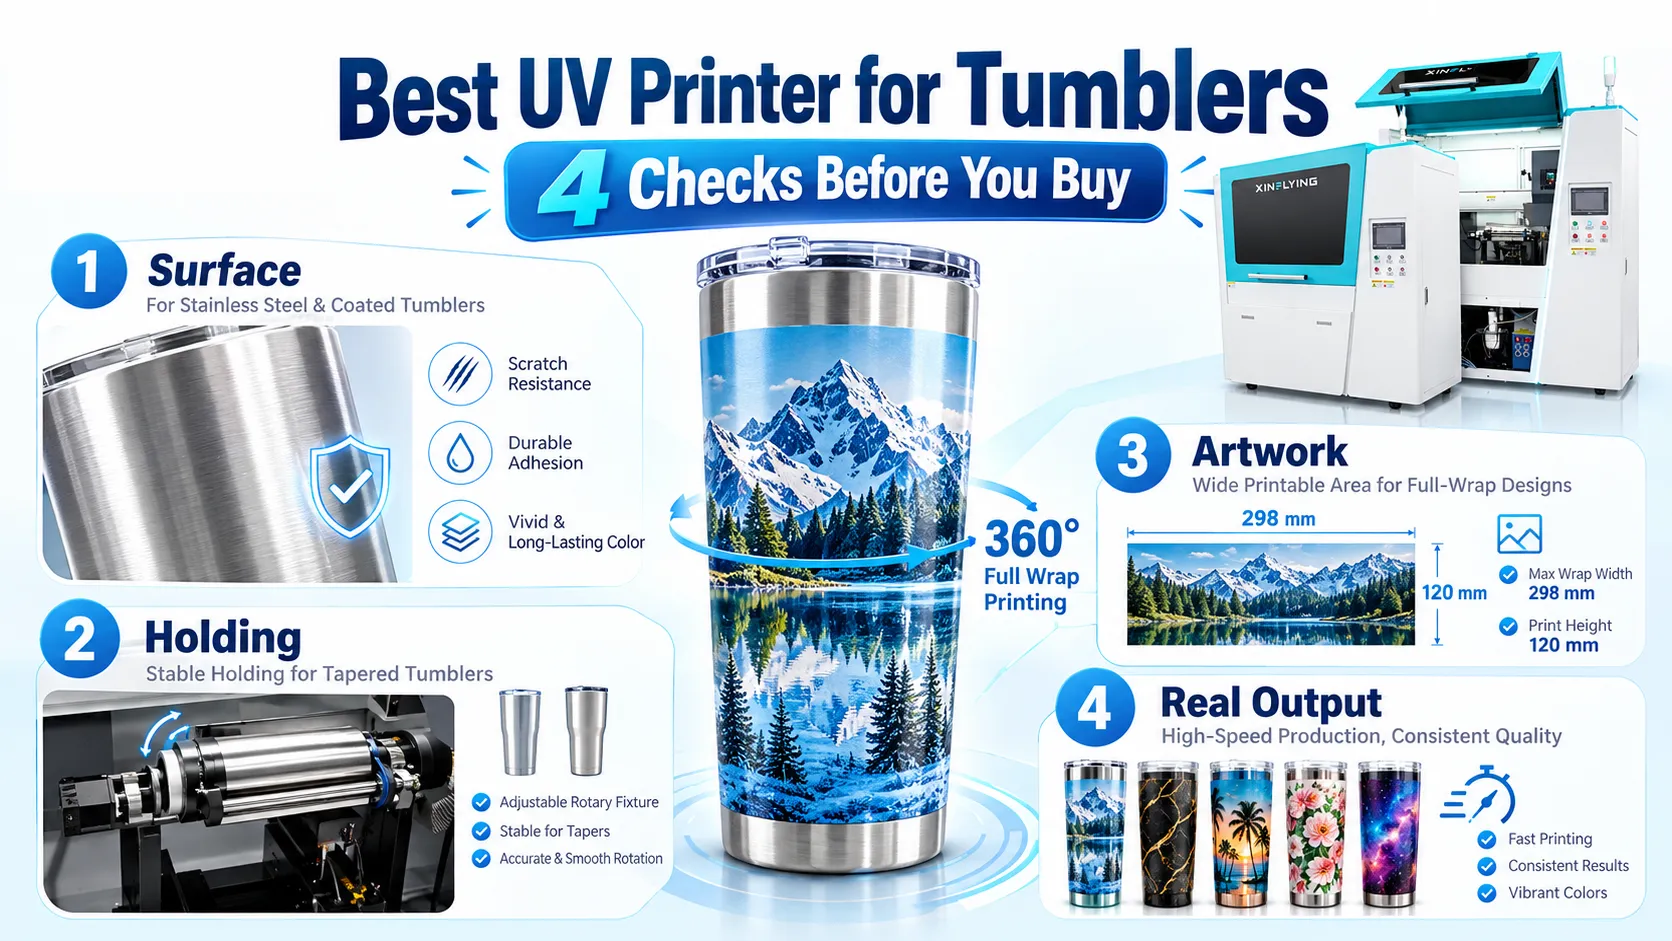
The best UV printer for tumblers is the one that can hold your actual cups, bond ink to their surfaces, fit your artwork, and finish a real order at a quality you can sell. A spec sheet answers only part of that. Diameter range, taper handling, white ink, and surface prep decide more jobs than headline speed or resolution.
This guide compares the three ways to handle UV printing on tumblers, then walks through four checks that separate a good demo from a good purchase. It also shows where our Xinflying Z300 cylindrical UV printer fits, and where another route makes more sense.
Three Ways to UV Print Tumblers
All three routes use UV-curable ink, which stays liquid until UV LED light hardens it within seconds. If curing is new to you, our explainer on how UV printing works covers the basics. The real difference is how the image reaches the cup.
| Route | How the cup gets decorated | Best fit | Main trade-off |
|---|---|---|---|
| Dedicated cylindrical UV printer | The cup sits in a rotary fixture and is printed directly as it turns | Steady tumbler, bottle, and can orders; full wraps; several cup sizes | Higher investment and floor space; built only for round and tapered objects |
| Flatbed UV printer + rotary attachment | The flat tray is swapped for a roller attachment, then the cup is printed directly | Shops that print flat items most days and cups some days | Changeover between modes; diameter and taper limits vary by attachment |
| UV DTF transfers | The design is printed on film, laminated, then applied to the cup by hand | Handled mugs, odd curves, shapes that can’t rotate steadily, selling loose wraps | Film, lamination, and hand application add steps to every cup |
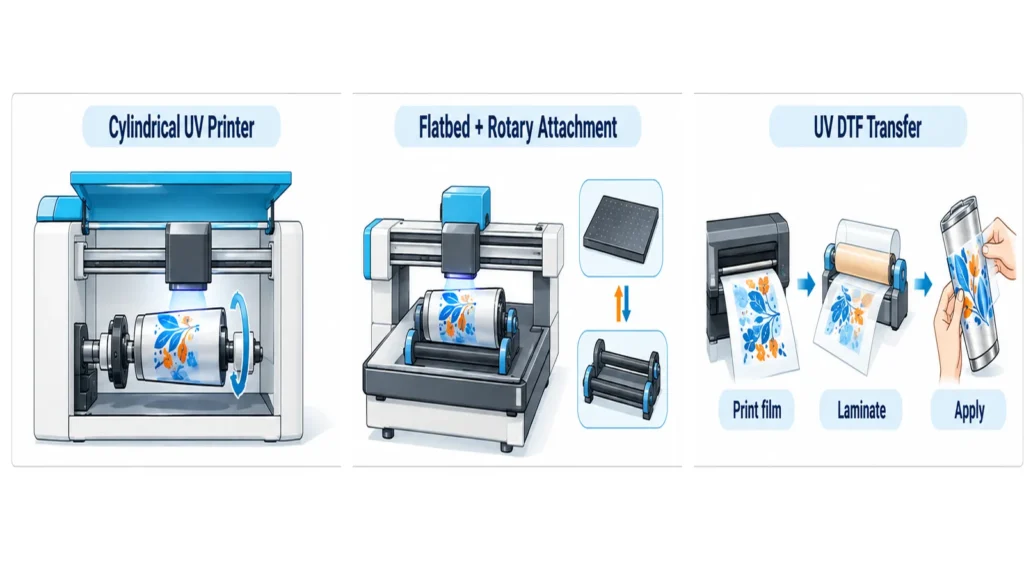
If tumblers are a side line, a flatbed with a rotary attachment keeps flat work and cups on one printer. If drinkware is your main product, a dedicated cylindrical printer removes the changeover and usually takes a wider size range. For reference, at least one popular desktop rotary attachment lists cup diameters of 45–100 mm, so wide-body tumblers and bottles can fall outside an attachment’s reach.
Sublimation often shows up on “best printer for tumblers” lists, but it isn’t UV printing. It moves dye into a polymer coating, so it needs sublimation-ready blanks and won’t decorate bare stainless or dark powder coat. If you already sell coated white blanks, our guide to a dye sublimation printer for mugs explains that route.
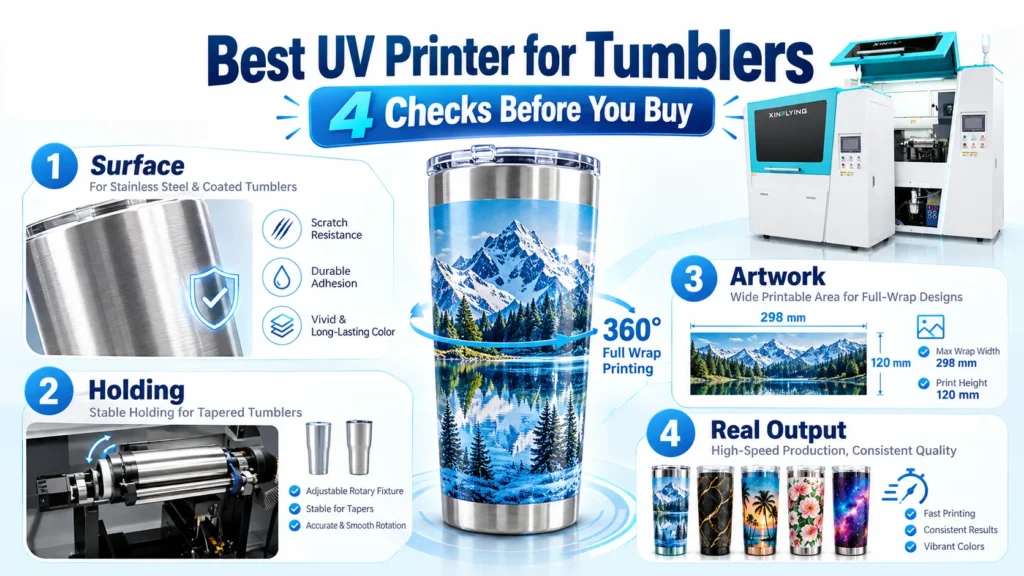
Four Checks That Decide the Purchase
Most buying mistakes come from treating four separate questions as one. “This printer prints on stainless steel” is not the same as “this printer can put my wrap on my 30 oz tapered cup, 200 times this week.” Split the questions, and each one gets its own proof.
| Check | The question | What actually proves it |
|---|---|---|
| 1. Surface | Will the ink bond to this exact cup finish? | A sample on your cup, with any cleaner or primer named, then scratch and wash checks after full cure |
| 2. Holding | Can the fixture center and rotate this cup steadily? | Your cup loaded in the demo, with diameter, length, taper, lid ring, and base checked |
| 3. Artwork | Does the design fit the printable zone and seam? | Your file printed at full size, with seam position and rim clearance confirmed |
| 4. Order | Can the setup deliver the batch at accepted quality? | A timed run of several cups, from first load to last accepted piece, rejects counted |
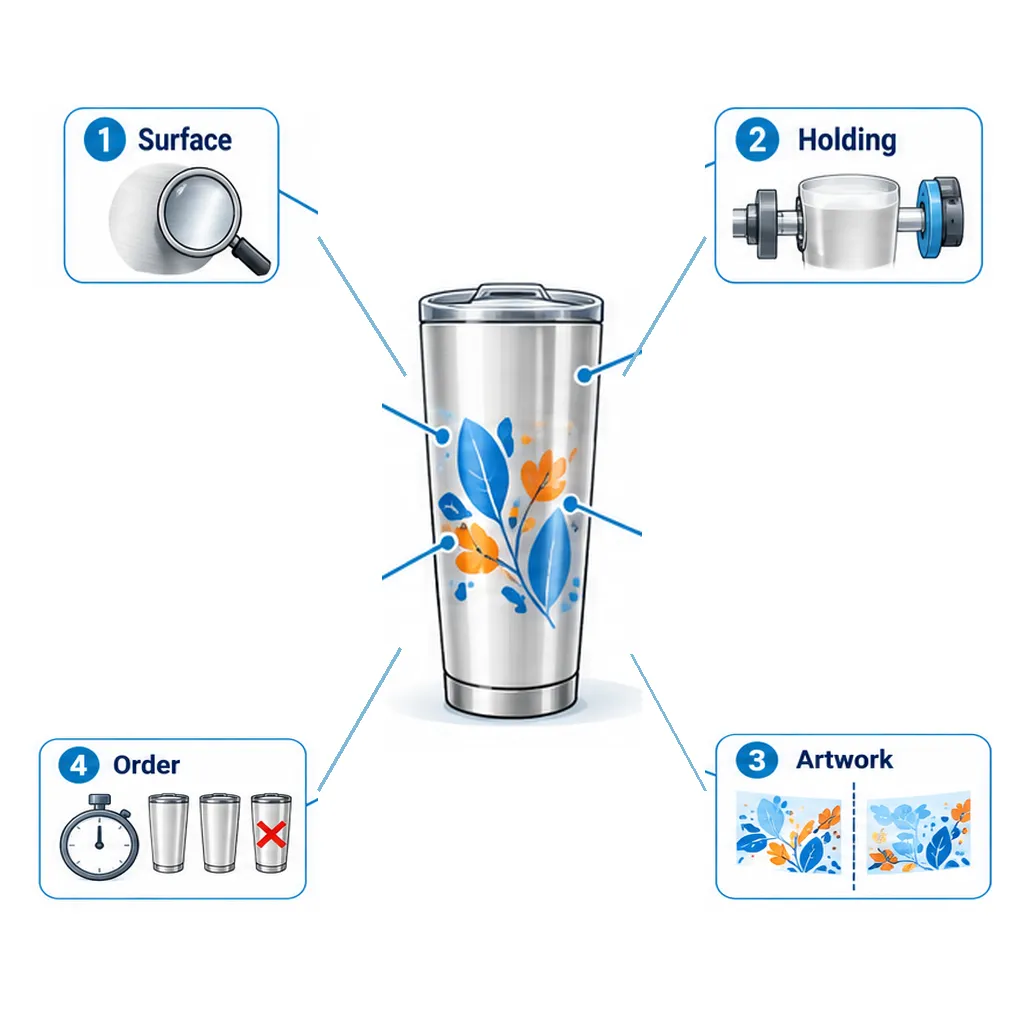
A brochure material list covers only check 1, and only in general terms. Checks 2 and 3 depend on the shape of your blanks. Check 4 depends on the whole workflow, not the printhead alone.
Check 1: Tumbler Surfaces and Ink Adhesion
A material list tells you what a printer can work with in principle. Adhesion on your cup depends on the exact finish, the ink, and the prep before printing. Stainless steel, coated metal, glass, and plastic rarely need the same treatment, so one passing sample doesn’t clear the whole range.
| Surface | What to watch | Evidence to ask for |
|---|---|---|
| Polished or bare stainless | Smooth metal can resist bonding; color needs a white base to stay vivid | Whether a primer was used, and scratch results after full cure |
| Powder-coated or painted stainless | Coatings vary by blank supplier and sometimes by batch | A sample on each supplier’s cup, not one generic “powder coat” test |
| Glass | Often needs a primer or adhesion promoter; clear glass changes how colors read | The pre-treatment step and the wash condition tested |
| Plastic (PP, Tritan, acrylic, and others) | Formulations differ; some bond well, others need treatment | A sample on the exact plastic from the supplier you’ll buy from |
Surface contamination causes a failure that’s easy to miss. Oil, fingerprints, dust, or silicone residue from packaging can let a print look perfect on day one and lift later. Build one repeatable cleaning step into the sample test, and judge adhesion after full cure, not straight off the machine.
A quick tape pull catches weak bonding early, but it doesn’t tell you how a cup survives daily washing. Test finished cups under the cleaning method your customers will use. Until your own results support it, don’t promise dishwasher-safe or food-contact performance. Ask the ink supplier for the Safety Data Sheet (SDS), and keep artwork below the area that touches the mouth.
Checks 2 and 3: Cup Shape, Taper, and Seam
Geometry rules out more printers than any other factor. Measure your blanks before you compare models.
Measure the print zone, not the capacity
Ounces don’t predict geometry. Two 20 oz tumblers from different suppliers can differ in diameter, taper, and rim height. Measure the diameter at the top and bottom of the area you want to print, plus the usable length between the lid ring and the base.
Wrap width equals diameter times π. A straight section 75 mm across has a circumference of about 235.6 mm (9.3 in). If the design shouldn’t meet itself, leave a gap in the artwork and place the seam deliberately, usually opposite the main logo.
Taper changes print distance and curing distance
Taper creates a problem that a flat spec can hide. Take an example print zone that measures 85 mm across at the top and 70 mm at the bottom, over 180 mm of length. The radius changes by 7.5 mm along that length.
If the cup lay level, its surface would drift 7.5 mm away from the head across the print. That exceeds the 5 mm print distance the Z300 spec sheet lists for its Epson i1600-U1 head. Tapered cups need a fixture that tilts, so the top line of the cup runs parallel with the head path. Otherwise droplets land less precisely at the narrow end, and fine text and edges soften.

The UV lamp faces the same gap. Uneven lamp distance can cure one end of the design differently from the other, so check edge sharpness and cure at both ends of a sample. Taper also distorts flat artwork, because the wide end travels farther per rotation. Ask how the RIP software compensates, and judge it on a printed cup rather than a screen preview.
Centering, lids, handles, and weight
A cup that sits slightly off center can make the image drift as it rotates, so a wrap that starts sharp ends misaligned. Raised lid rings and welded rims shorten the usable print length. A handle blocks full rotation and rules out a seamless 360° wrap on most fixtures.
Light plastic cups can slip, so load your heaviest and lightest blanks during the demo. A fixture that holds every cup the same way, every time, is worth more than a faster cycle that needs constant adjustment.
White, CMYK, and Varnish: What Each Layer Does
Ink configuration decides which designs you can sell, not just how bright they look. Each layer has a separate job:
- White prints first as a base on dark, metallic, or clear surfaces. Without it, color sinks into black powder coat and looks thin on steel or glass. White can also stand alone for white text on dark cups.
- CMYK builds full-color images, gradients, and photos on top of the white base.
- Varnish adds a clear gloss layer. It can cover the whole design or only selected areas for spot-gloss contrast; leaving it off gives a flatter, matte look.
White needs tuning. Too much can thicken the print and change its texture, while too little lets the surface show through. On clear glass, the amount of white behind the color decides whether a design looks solid or see-through, so print one design both ways if you sell glassware. The Z300 runs W + CMYK + V, with one channel each for white, CMYK, and varnish.
Check 4: Seconds per Cup Isn’t Cups per Hour
A rated print time measures the print cycle only. Loading, alignment, unloading, inspection, artwork changes, and rejects come out of the same hour.
The Z300 is rated at 40 seconds per piece in 4-pass mode. That’s a manufacturer rating, not a timing from your cups, and it excludes handling. The table below uses assumed numbers to show the method:
| Step (example only) | Value |
|---|---|
| Rated print time | 40 s |
| Assumed loading, alignment, unloading, and quick check | 35 s |
| Total per cup | 75 s |
| Theoretical cups in 60 minutes | 48 |
| Assumed 10 minutes lost to artwork changes and nozzle checks | 40 cups in 50 productive minutes |
| Assumed 2 rejects | 38 accepted cups per hour |
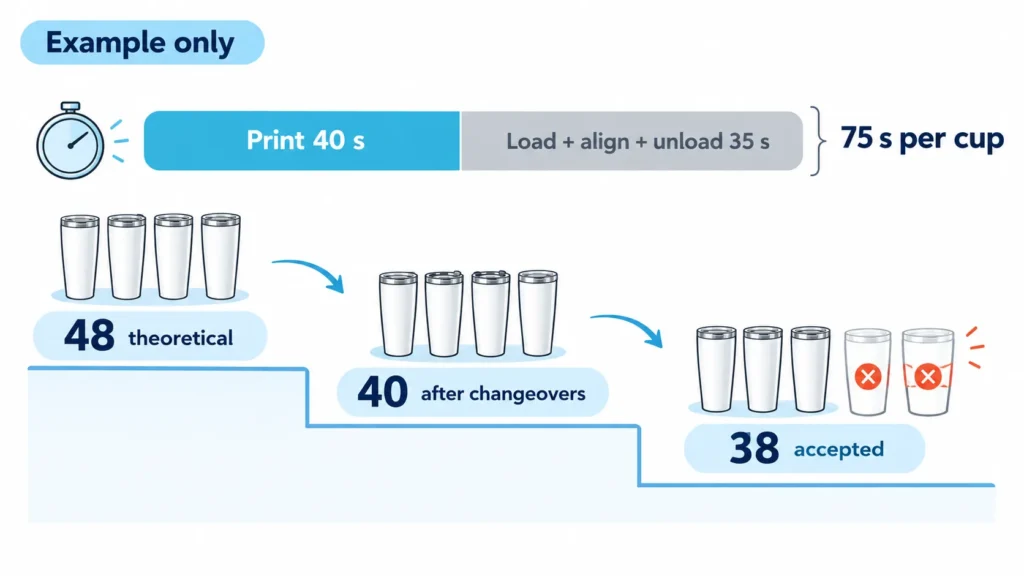
Compare printers on accepted cups divided by total elapsed time, not on seconds per print. One two-person promotional shop we spoke with learned this while choosing UV DTF equipment for 20 oz and 30 oz stainless tumblers. Their slowest step wasn’t printing; it was film handling, weeding, and application, none of which appeared in any speed figure.
So they brought their hardest design, with 1 pt text and small gradients, to each demo. They ran 10 pieces and logged first start, last finish, every stop, and every reject. The same habit works for direct printing: time the pass mode you’d actually sell, since fewer passes print faster but can show more banding.
Downtime eats output too. Plan nozzle checks and white ink care with our UV printer maintenance checklist.
Where the Xinflying Z300 Fits
We built the Z300 (model XF-Z300-3I16U1) for direct printing on cylindrical and conical objects made of stainless steel, glass, plastic, and more. Its applications include tumblers, drinkware, wine bottles, cosmetic bottles, cans, and promotional gifts. It prints straight onto the object, with no transfer film.
| Specification | Z300 | What it means for tumbler orders |
|---|---|---|
| Printhead | Epson i1600-U1 | 5 mm print distance, so the fixture must level tapered cups |
| Ink setup | W + CMYK + V, factory hard UV ink | White base for dark, metallic, and clear cups; varnish for gloss or spot gloss |
| Print length | 80–280 mm (about 3.1–11 in) | Short cups through tall bottles; lid rings and bases still limit artwork |
| Print diameter | 45–150 mm (about 1.8–5.9 in), customizable | Slim to wide-body drinkware; confirm sizes outside this range first |
| Resolution | 900 × 1200 dpi | Manufacturer spec; judge fine text on your own sample |
| Rated speed | 4-pass: 40 s per piece | Print cycle only; add handling to estimate hourly output |
| Holding and positioning | Adjustable rotary fixture with electric clamping, tilt, and lift; red-light positioning | Tilt keeps tapered cups parallel to the head; red light speeds manual alignment |
| Object measurement | Smart camera builds a model of the object; printhead anti-collision | Fewer manual height settings and less risk of head strikes |
| Ink and curing | Negative-pressure ink supply, white ink stirring, head heating, low-ink and waste-ink alarms; water-cooled UV LED lamp | Steadier white ink and curing over long runs |
| Files and software | TIFF, PDF, PNG; Windows 10/11 (64-bit) | Standard design files print without conversion |
| Power | AC 220 V, 50–60 Hz, 13.6 A, 3 kW | Plan a 220 V circuit before delivery |
| Size and weight | 1540 × 800 × 1730 mm; net 550 kg (about 1,213 lb) | Needs a dedicated floor spot and equipment to move it in |
| Environment | 20–35 °C (68–95 °F), 45–65% RH | Keep away from unheated or very dry rooms |
A real Z300 sample on a stainless tumbler
In an internal test, we printed a white stainless steel tumbler on the Z300 with a full-color mountain and daisy scene wrapped around the body. The cup was printed on its existing surface with no extra pre-treatment, and our team was pleased with the result.
That sample shows what the printer produced on that cup. It isn’t an adhesion, scratch, or dishwasher test, and one stainless tumbler doesn’t predict results on glass, plastic, or another supplier’s coating. That’s why we sample on buyers’ own blanks.
Good fit and poor fit
The Z300 suits:
- Shops with steady tumbler, bottle, or can orders across several sizes within 45–150 mm diameter.
- Full-color wraps on dark, metallic, or clear drinkware that need a white base.
- Decorators moving from UV DTF wraps to direct printing to drop film and hand application.
- Promotional product makers who print cups, bottles, and cans in the same week.
It’s the wrong choice for:
- Businesses that print mostly flat items such as signs, phone cases, or acrylic; a UV flatbed printer fits that work better.
- Objects under 45 mm in diameter or longer than 280 mm, unless a customized range is confirmed first.
- Handled mugs and irregular shapes, which our documents don’t cover; test them before relying on direct printing.
- Hobby volumes, or spaces without a 220 V circuit and room for a 550 kg machine.
To see the Z300 alongside our other equipment, browse the UV printer machine range.
Direct UV Printing vs. UV DTF for Tumblers
Direct printing puts the image on the cup in one trip through the machine. UV DTF adds steps to every cup: print the film, laminate, trim, peel, apply, and press out bubbles. Each step adds labor, and wrap edges can sometimes be felt.
UV DTF still makes sense for handled mugs, curved bottles, and shapes that can’t rotate steadily. It also suits shops that print wraps ahead of time or sell transfers instead of finished cups. If that’s your work, compare our UV DTF printer machines and see how to make UV DTF cup wraps.
How to Run a Sample Test Before You Buy
A good sample test answers all four checks with your blanks and your artwork. Send a small test set instead of one easy cup.
| Sample | Why include it | What to record |
|---|---|---|
| Your best-selling tumbler | Sets the baseline for most orders | Print mode, load-to-unload time, overall finish |
| Your hardest shape (steepest taper, smallest, or largest) | Tests fixture range and taper leveling | Whether it clamped without shims; edge sharpness at both ends |
| Your darkest or glossiest finish | Tests white coverage and adhesion | White opacity, color strength, scratch result after full cure |
| A glass or plastic item, if you sell them | Tests pre-treatment needs | Cleaner or primer used, and wash result under your intended use |
Use one test file that combines fine text around 1 pt, a smooth gradient, a full wrap with a visible seam, and a white-on-dark element. Default sample art hides the weaknesses that cost you reprints.
Before you sign, get these points in writing:
- The exact printer configuration, ink set, and any primer or pre-treatment products.
- Which fixtures or adapters are included for your cup sizes.
- RIP software licensing, installation, and training arrangements.
- Warranty scope, including excluded parts.
- Voltage, shipping terms, estimated lead time, and spare parts availability.
At Xinflying, our sales team quotes each printer configuration after confirming your requirements, so there’s no fixed public price list. Unless the quote or contract says otherwise, eligible equipment carries a 12-month limited warranty from the shipping date. That warranty generally excludes printheads after successful installation testing, consumables, and listed wear parts, and remote technical support remains available after it ends.
FAQ
It depends on your blanks. Sublimation needs sublimation-coated blanks, UV direct printing decorates stainless, powder coat, glass, and plastic, and UV DTF makes wraps you apply by hand. For direct UV printing on tumblers, choose between a flatbed with a rotary attachment and a dedicated cylindrical printer based on your volume and cup sizes.
Sometimes. Our Z300 sample was printed on a stainless tumbler’s existing surface without extra pre-treatment, but finishes vary by supplier. Test your exact cup and check scratch resistance after full cure before skipping primer on production orders.
Not automatically. Results depend on the surface, ink, pre-treatment, and wash conditions. Test finished cups under the cleaning method your customers will use before making any dishwasher claim.
A rotary attachment suits shops that print mostly flat items and some cups, since one printer covers both. A dedicated cylindrical printer suits drinkware-focused shops: it skips the changeover and usually handles a wider range of cup sizes.
Yes. The Z300 is built for cylindrical and conical objects, and its fixture tilts to keep a tapered surface parallel with the printhead. Send your steepest cup for sampling to confirm the result.
Cost varies widely by route. Desktop flatbeds with rotary attachments sit at the low end, and dedicated cylindrical printers cost more. We quote the Z300 by configuration, so share your cup sizes and expected volume for a written quote.
Usually, if the cups and bottles are round or tapered and fall within the printer’s diameter and length range. Handled mugs and curved bottles are the common exceptions, so test them first or use UV DTF for those shapes.
Send Us Your Cups Before You Choose
The surest way to find the best UV printer for tumblers is to print your own. List your three most common cup models, your hardest shape, and your expected weekly volume. Then pick one test design with fine text, a gradient, and a full wrap.
Contact our team with those details. We’ll confirm whether the Z300 fits your cups, arrange a sample on your blanks, and prepare a written quote for the configuration you need.