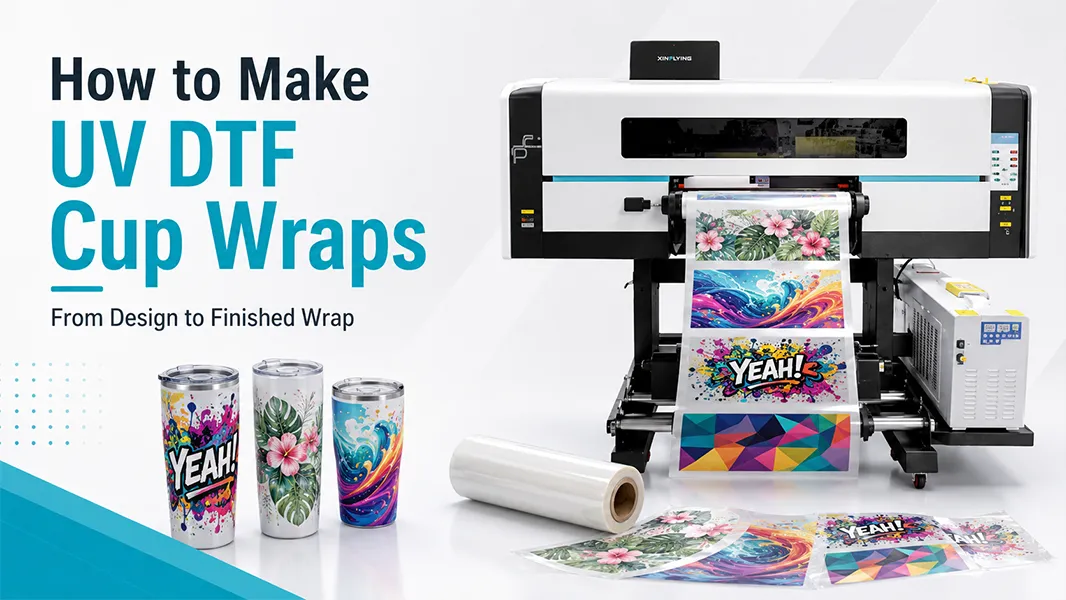
UV DTF cup wraps give makers and print businesses a way to decorate tumblers, mugs, bottles, and other smooth hard-surface products without printing directly onto every object. Instead of putting the artwork on the cup inside the printer, you produce a ready-to-apply UV DTF transfer on film and apply it later.
That makes UV DTF useful for short runs, personalized drinkware, logo labels, gift products, and mixed blank inventories. But successful cup wraps depend on more than a colorful design. The artwork size, surface condition, film system, lamination, curing, and application method all affect whether the finished wrap looks premium or starts lifting at the edges.
This guide focuses on how to make the wrap itself. For the installation process on a cup, link to your companion article: How to Apply UV DTF Cup Wraps.
What Is a UV DTF Cup Wrap?
A UV DTF cup wrap is a UV-cured printed transfer designed to be applied to a hard, smooth object. The transfer is normally produced on a film system that includes a printable film and a carrier or laminating film. The print may include color, white ink, and varnish or other layers depending on the printer and workflow.
Unlike sublimation, UV DTF does not rely on heat to turn dye into gas and bond it into a polyester coating. Unlike direct UV printing, the cup does not need to pass through the printer. The finished transfer is applied after printing.
That distinction is important: UV DTF is a transfer-decoration workflow, and results should be tested on the final substrate rather than assumed from a flat film sample.
Choose Suitable Cups and Tumblers First
Not every cup is equally suitable for UV DTF Printer Machine. Smooth, clean, rigid surfaces are generally easier to decorate than heavily textured, soft-touch, low-energy, or sharply curved surfaces.
Good candidates for testing include:
- Smooth powder-coated tumblers.
- Glass cups and bottles.
- Acrylic and rigid plastic drinkware.
- Metal drinkware with a smooth coating.
- Flat or gently curved hard-surface gift items.
More challenging substrates include rough ceramic glazes, rubber-like coatings, deeply textured surfaces, flexible plastics, and heavily tapered cups. With these items, adhesion and visual alignment can vary dramatically.
Step 1: Measure the Printable Area
Cup wrap failures often begin before printing. Measure the usable decoration area rather than relying on a generic template.
Record:
- Maximum wrap width around the cup.
- Printable height between the base, lip, handle, taper, or lid area.
- Whether the cup is straight-sided or tapered.
- Where a seam or overlap will be least visible.
- Any curved areas that may distort a long graphic.
For straight tumblers, a full-width wrap can work well. For tapered cups, consider a shorter graphic, split panels, or a design that visually tolerates a small gap or overlap. Trying to force a perfect rectangular wrap around a tapered cone is one of the most common causes of wrinkles and lifted edges.
Step 2: Build Artwork for the Surface, Not Just the Screen
Create artwork at the final physical size. Use high-resolution raster images or vector art, and keep important text away from the outer edge of the wrap.
A few practical design rules:
- Leave a small safety margin around the artwork.
- Avoid placing tiny text directly on a high-curvature area.
- Build seam placement into the design rather than treating it as an accident.
- Use a background that can tolerate a small alignment variation when wrapping around a cup.
- Make test swatches for transparent effects, fine detail, and light colors.
Do not assume that every visual effect will look identical on film and on a curved metallic or coated substrate. Cup color, gloss, texture, and lighting all influence the final appearance.
Step 3: Prepare the UV DTF Printer and Film System
Before printing a production batch, complete the basic machine checks:
- Confirm the correct film roll is loaded and oriented properly.
- Run a nozzle check and clean if needed.
- Verify the RIP profile, print order, and white/varnish settings for your material system.
- Confirm the film is tracking straight and the take-up system is working.
- Make sure the room is clean enough to keep dust out of the printed adhesive surface.
Use the printer, inks, and film as a matched system whenever possible. Changing only one material – for example, a new film while keeping the old RIP profile – can change color, adhesion, or release behavior.
A production model such as the Xin Flying XF-600S UV DTF Printer should be evaluated around the total workflow: available width, film handling, cure/lamination process, finishing space, operator training, and access to consumables and support.
Step 4: Print the Transfer Layers
The exact layer stack depends on your printer and RIP configuration. A typical UV DTF transfer may include color, white, and varnish layers. The white layer provides opacity where the design needs to stand out on dark or colored cups. Varnish can influence the surface finish and visual depth.
Print a small test before running a full batch. Inspect it for:
- Correct artwork orientation.
- Clean text and fine details.
- Solid color areas without banding.
- Consistent white opacity.
- Proper spacing between designs.
- No unexpected marks from dust or film handling.
A cup wrap can be visually impressive on the printer but still fail later if the film is damaged, laminated poorly, or applied to an unsuitable surface. Test the full sequence.
Step 5: Laminate and Cure According to Your Film System
After printing, the transfer is typically laminated with a carrier film. The film supplier may describe the layers as A film and B film, but naming conventions differ. What matters is understanding which layer is the release liner and which layer remains as the clear carrier during application.
Follow the film supplier’s recommended lamination and curing procedure. Avoid rushing this stage. Incomplete lamination, trapped dust, uneven pressure, or poor film tension can create problems that only become visible when the customer peels the carrier film from a cup.
Check the laminated sheet under angled light. Look for air channels, film wrinkles, contamination, incomplete contact, or areas where the transfer has not bonded correctly to the carrier layer.
Step 6: Cut and Organize the Cup Wraps
Cut each transfer with enough handling margin to make application easier, but do not leave excessive clear film around a detailed shape. Extra film can make curved applications harder and can show more clearly on certain cup finishes.
For batch jobs, label each group by size, cup model, artwork version, and date. This matters when you run multiple designs or use several cup blanks with slightly different diameters.
Step 7: Test Before You Sell
Every new combination should be tested as a complete product system:
- Cup surface and coating.
- Cleaning method.
- UV DTF film and ink combination.
- Artwork coverage and wrap geometry.
- Application method and dwell time.
- Expected customer care instructions.
Do not make blanket claims such as “dishwasher safe” or “permanent” unless you have validated that exact cup, transfer system, and use condition. For most small businesses, a conservative care instruction and a documented test sample are better than a large promise that cannot be repeated consistently.
Common Problems When Making UV DTF Cup Wraps
The wrap looks good flat but wrinkles on the cup
The artwork may be too large for the cup taper or curvature. Reduce the width, split the design, move the seam, or use a cup-specific template.
Fine details look weak or break apart
Review the source artwork, RIP resolution, white-layer settings, and film handling. Fine details must survive printing, lamination, cutting, and application – not only the first print.
Edges lift after application
Check the cup surface, cleaning method, curve tension, film compatibility, and dwell time before carrier removal. Edge lift is often a system issue, not just an application mistake.
The printed sheet has visible marks or contamination
Improve dust control, film storage, operator handling, and lamination cleanliness. A single particle can become obvious on a glossy cup wrap.
Build a Reliable UV DTF Cup-Wrap Product Line
A dependable product line starts with a limited number of tested cup blanks. Create approved templates, lock the RIP profile, record the material system, and keep a sample library. Once those foundations are stable, personalization becomes much faster and less risky.
UV DTF is especially useful when your business needs attractive, short-run hard-surface customization without changing the direct-print setup for every cup. The win is not just speed. It is the ability to turn a repeatable film workflow into a flexible finished-product workflow.
FAQ: How to Make UV DTF Cup Wraps
Do UV DTF cup wraps need a heat press?
Usually, no. UV DTF transfers are designed to be applied as pressure-sensitive transfers. The exact application procedure depends on the film system and substrate, so follow the supplier’s instructions and test your cup blank.
Can UV DTF wraps be used on any tumbler?
No. Smooth, clean, rigid surfaces are generally easier. Textured, soft-touch, highly tapered, flexible, or low-energy surfaces may need special testing and may not give reliable results. For a solution-oriented page, use the UV DTF Sticker Printer solution page.
Do I need to print a full wrap?
Not always. Smaller labels, logos, name decals, and partial wraps are often easier to apply and can be more reliable on tapered cups.
What is the biggest mistake when making cup wraps?
Skipping substrate testing. A transfer can look perfect on film but behave differently on a specific coating, cup shape, or cleaning condition.