Sublimation printer maintenance starts with a nozzle test at startup and shutdown, a check of the waste-ink container and ink lines, and correct printhead capping after work. The schedule below adds capping-station and wiper cleaning, motion-system checks, idle-period care, and replacement planning. It is based on Xinflying’s general maintenance guide for sublimation printers using water-based ink.
Scope: The water and cleaning steps in this guide apply only to the equipment and ink type covered by the Xinflying manual. Do not transfer them to UV, solvent, or other ink systems. Software menu names, cleaning fluids, lubricant points, and printhead removal methods depend on the printer configuration; use the supplied instructions for those operations.
Sublimation Printer Maintenance Schedule at a Glance
| When | Check or service task | What to record |
|---|---|---|
| At startup and shutdown | Print a nozzle test; check the pattern; confirm the head caps correctly after work | Photos or dated test strips and any missing lines |
| Daily | Check waste ink against the red level line; inspect visible ink tubing for air, thickening, or poor flow | Waste level, tube condition, affected color |
| About every 15 days | Clean the capping station and wiper; review the belt and gear lubrication point specified in the manual | Buildup, cleaning method, lubricant used |
| Every 3-4 weeks | Clean the encoder strip (called the “grating strip” in the source) using the approved method | Visible contamination and print-position changes |
| Monthly | Lubricate the guide rail with the approved oil and method | Rail condition and service date |
| Annually | Inspect the power cord and socket for aging or damage | Condition and corrective action |
| During long idle periods | Follow the two-week cleaning schedule for a one-month break; arrange technician preparation for three months or longer | Last nozzle test, cleaning dates, storage procedure |
The manual also gives planning intervals for filters, dampers, wipers, caps, tubing, pumps, the encoder strip, drive belt, and pinch rollers. Those appear later in this guide. Keep a dated maintenance log: a change in nozzle patterns or feed accuracy is easier to investigate when you can see what changed and when.
What Should You Check Every Day?
A daily routine should establish a clean nozzle baseline, reveal ink-supply problems early, and leave the printhead sealed on its capping station after production.
- Check the waste-ink container. The Xinflying guide says to empty it when ink reaches the red line. Use the printer’s waste-handling procedure; prevent overflow and record an unexpected rise in waste ink.
- Inspect visible ink lines. Look for air and signs of thickened or coagulated ink in the tubing or tank. The manual links this condition to poor ink flow and calls for cleaning the affected ink tube and tank. Do not open a sealed ink path without the correct procedure.
- Print a startup nozzle test. Save a dated strip or photo. If the pattern is incomplete, try the software’s approved weak-cleaning function and retest. The guide directs users to contact Xinflying after three weak-cleaning attempts without improvement.
- Print a shutdown nozzle test. Compare it with the startup pattern and note any channel that deteriorated during the shift.
- Confirm correct capping. Before leaving the printer idle, make sure the printhead returns to the capping station and seals as designed. An uncapped head can dry and clog.
Daily checks in photos
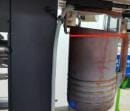
Empty the waste-ink container when the ink reaches the red line.
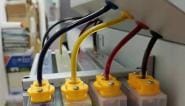
Check the ink tubes for air and changes in ink flow.

The manual highlights a tube area to inspect when ink delivery looks abnormal.
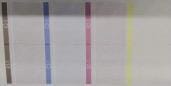
Save a nozzle test at startup and shutdown so the patterns can be compared.

Confirm that the printhead returns to the cap after work.
Repeated cleaning is not a substitute for diagnosis. If one color repeatedly drops out, document the nozzle pattern, ink level, visible air in the line, and recent maintenance before asking support to investigate the ink path, cap, or printhead.
How Should You Clean the Capping Station and Wiper?
The Xinflying guide places capping-station and wiper cleaning on an approximately 15-day schedule. The cap helps seal and moisten the printhead when the printer is idle; dried residue on the cap or wiper can interfere with that contact.
For the water-based ink system covered by the manual, the illustrated procedure moves the carriage to the center, uses the software’s “Loading ink” function, and slowly applies purified water to the capping station. The wiper is cleaned with a dust-free cloth dampened with purified water. The guide tells users to request Xinflying’s video if they are unsure of the capping-station process. Follow that video or the supplied model instructions before moving the carriage or using a software priming function.
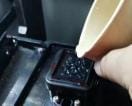
The manual illustrates its capping-station cleaning method for water-based ink systems.
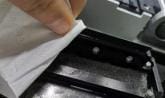
Keep liquid away from cables, connectors, and electrical boards. Water mentioned for the cap and wiper is not permission to soak the printhead, pour water into an ink line, or use water on another ink technology. If the cap is damaged or fails to seal, cleaning alone may not restore correct capping; ask support to inspect it.
How Do You Maintain the Encoder Strip, Guide Rail, and Belt?
The encoder strip is the thin position-reading strip the manual calls a “grating strip.” Xinflying recommends cleaning it every three weeks to one month. Its general procedure uses a dust-free cloth with a small amount of alcohol. Clean only the specified strip with the method approved for your machine: excessive liquid, rough wiping, or touching nearby electrical parts can create a new positioning problem. Record any horizontal misalignment or repeated ink-placement defect in the same position.

The encoder strip is called the “grating strip” in the source manual.
The guide rail has a monthly lubrication task using sewing-machine oil. Apply oil only where and how the printer instructions show, and keep it away from the encoder strip, printhead, and media path. The manual separately suggests checking lubrication around the belt ends and gear-mesh area about every 15 days. Because belt and gear constructions differ, confirm the exact lubricant and application point with Xinflying before applying anything to a belt. Do not coat the belt by guesswork.
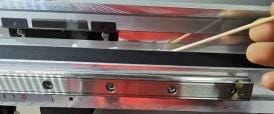
Use the application point and lubricant stated for the installed printer.
A dirty strip, worn belt, and paper-feed issue can produce different kinds of position error. Treat visible symptoms as clues for inspection rather than replacing a part solely because a print is misaligned.
What If the Sublimation Printer Will Be Idle?
For a break of around one month, Xinflying recommends performing a cleaning once every two weeks. Keep a record of the cleaning date and a nozzle test, and confirm that the printhead is correctly capped between visits.
For a shutdown of three months or longer, the manual recommends emptying the ink path, removing and cleaning the printhead or nozzle assembly, and storing it separately. This is a service procedure, not a casual end-of-shift task. Ask Xinflying for the exact flushing fluid, removal sequence, storage method, and restart procedure for the installed printer before beginning. Do not leave an opened ink path or removed head exposed without the prescribed protection.
The time between one and three months is not separately defined in the source. Plan the idle period with support rather than extending a short-break routine without checking whether it protects the ink system for the full duration.
When Should Filters and Wear Parts Be Replaced?
The Xinflying document gives the following planning intervals. Inspect parts sooner when ink flow, capping, paper feed, or print positioning changes. Actual life varies with ink formulation, viscosity, workload, and component condition; the table is not a reason to replace a healthy part automatically.
| Part | Interval in the Xinflying guide | What should trigger an earlier check? |
|---|---|---|
| Ink filter | 3-6 months | Restricted ink flow or recurring channel loss |
| Damper | About 6 months | Air, leakage, unstable ink delivery |
| Wiper | About 6 months | Wear, hardened residue, poor wiping contact |
| Capping unit | About 6 months | Poor seal, damage, repeated nozzle drying |
| Synchronous belt | About 1 year | Irregular horizontal displacement |
| Ink tube and ink pump | About 2 years | Aging, leaks, poor ink delivery |
| Encoder strip | About 2 years | Horizontal misalignment or repeated print defects at the same position |
| Pinch roller | About 2 years | Abnormal media stepping or paper that is not held firmly |
The guide calls for a separate annual check of the power cord and socket for aging. Stop using damaged electrical components and arrange qualified replacement. Keep the dates and observed symptoms in the maintenance log so service decisions reflect the condition of the machine.
What Should You Check When Print Quality Changes?
A bad test strip or misaligned print can have several causes. Start with the observable symptom and the relevant maintenance area; do not treat this table as a final diagnosis.
| Symptom | First checks | When to escalate |
|---|---|---|
| Missing lines on the nozzle test | Ink supply, visible air, cap contact; approved weak clean | No improvement after three weak-cleaning attempts |
| One color repeatedly drops out | Tube or tank condition, damper, visible air or thickened ink | Ink-path cleaning or part inspection is needed |
| Repeated horizontal defect at one position | Encoder strip contamination or damage | Cleaning does not resolve the repeatable error |
| Irregular horizontal displacement | Synchronous belt condition | The belt is worn or its adjustment is uncertain |
| Media steps abnormally or slips | Pinch-roller pressure and condition | The paper is not held firmly after routine checks |
| Head dries during idle time | Carriage parking and capping seal | Cap is worn, misaligned, or does not seal |
Field Case: Missing Nozzles After a 28-Day Shutdown
Anonymized customer service record supplied for this article; customer and location details are omitted.
A sportswear print shop restarted its water-based sublimation printer after 28 days without printing or interim maintenance. Its startup nozzle test showed three to five consecutive gaps in both the magenta and cyan channels, while the latter half of the yellow pattern appeared faint. Fine white lines and uneven color appeared on a sample print. Three software weak-cleaning attempts did not improve the test.
The service team found the waste-ink container below its red line and no low-ink alert. In the visible supply tubes, however, the ink column had alternating dark sections and clear gaps, with poor flow. Inspection of the tubing and ink reservoir found thickened ink. The service record also noted that the printhead had not been properly parked on its cap during the break. Those observations led the team to address the ink path and capping area rather than continuing to clean the nozzle surface alone.
After the operator contacted support, a technician cleaned the capping station, flushed the affected tubing and reservoir, reassembled the ink path, and loaded fresh ink. The technician also cleaned the printhead surface as part of that service visit. These were actions taken on this customer’s machine; the general manual does not provide a universal tube-disassembly or printhead-wiping procedure for readers to repeat.
| Verification | Before service | After service |
|---|---|---|
| Nozzle test | Magenta and cyan had 3-5 missing nozzles; yellow was faint | Full patterns on three repeat tests |
| Sample print | Fine white lines and uneven color | No visible white lines; color matched the approved sample |
| Production check | Printing was interrupted | No ink dropout during a two-hour run |
| Follow-up | — | Customer reported normal output after 7 and 30 days |
What this case illustrates: An abnormal tube appearance is a reason to inspect the ink path; it does not, by itself, prove the cause of every missing nozzle. Here, the technician found thickened ink in the system, and the print recovered after ink-path service. The manual’s decision boundary was useful: when three weak cleans produced no improvement, the operator contacted support. Proper capping and the guide’s two-week cleaning routine during an approximately one-month break are the preventive steps identified in the service record.
Source and Next Steps
This article adapts Xinflying’s three-page general Maintenance and Instruction of Sublimation Printer (Only for water-based ink) document. The photos above are taken from that document. The anonymized field case is based on a separate customer service record supplied for this article. The general maintenance intervals and operator methods outside the case come from the guide; the field actions and outcomes in the case come from the customer service record. The troubleshooting tables organize those observations into an operator workflow.
Explore Xinflying dye-sublimation printers if you are evaluating equipment. For your existing printer, send Xinflying support the model, printhead type, nozzle-test photos, ink type, and symptom before opening the ink path, lubricating a belt, or preparing a long shutdown.