
Printhead Cleaning and Moisturizing
Select Your Printer Model
(Default: Universal)
Choose your model from the drop-down menu below.
XINFLYING Printhead Cleaning and Moisturizing
Applicable Model: Universal
Video Tutorial
Watch the motherboard replacement and wiring procedure for the XINFLYING T604 DTF Printer.
Remove residual ink, flush the printhead with a compatible cleaning mixture, and finish with a pure water rinse. Keep the electrical connections dry throughout.
Applicable model: General. Required items: syringe with a short soft tube, compatible blue DTF cleaning solution and pure water, protective towels or cloth, and a waste container.
Step 1. Protect the Cables and Remove the Damper
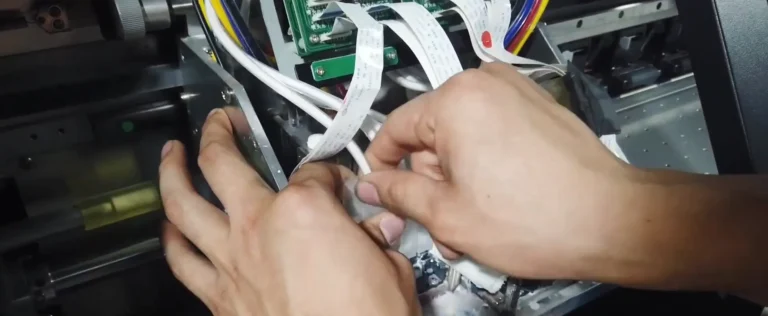
1.1 Position the carriage for access, switch off the printer, and unplug it before handling the printhead. Cover the ribbon cable connections with two clean towels or cloth pieces and place a waste container beneath the printhead (See Figure 1.1, left).
1.2 Lift the ink damper out of the printhead inlet while keeping its supply tube attached (See Figure 1.1, right).

Step 2. Draw Out Ink and Prepare the Mixture
2.1 Connect the syringe tube to the exposed printhead inlet. Gently pull the plunger to draw out residual ink, then disconnect the tube and discharge the ink into the waste container (See Figure 2.1).

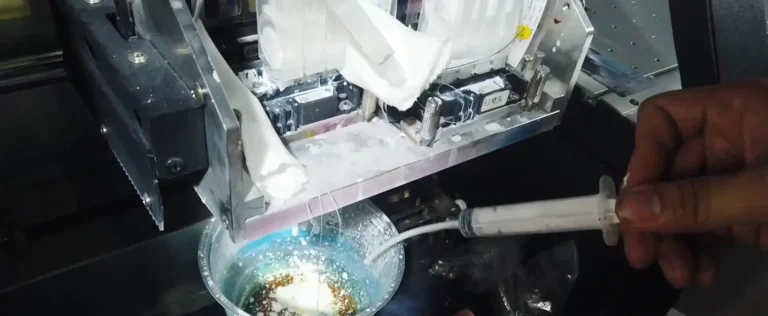
2.2 Rinse the syringe with compatible pure water and discard the rinse water. Prepare equal volumes of blue DTF cleaning solution and pure water in the syringe. Use this 1 to 1 dilution only with a cleaning solution approved for that ratio and the installed printhead (See Figure 2.2).


Step 3. Flush and Extract the Cleaning Mixture
3.1 Reconnect the soft tube to the printhead inlet and gently press the plunger to feed the cleaning mixture through the printhead. Stop if there is resistance; do not force liquid through (See Figure 3.1, left).
3.2 Observe the liquid leaving the nozzle area and collect it in the waste container (See Figure 3.1, right).


3.3 Gently pull the plunger to extract the cleaning mixture remaining inside the printhead, then discharge it into the waste container (See Figure 3.2).

Step 4. Rinse and Restore the Ink Damper
4.1 Fill the cleaned syringe with compatible pure water. Connect it to the same inlet and gently rinse the printhead. Check the flow from the nozzle area; repeat cleaning and rinsing if the flow remains incomplete (See Figure 4.1).

4.2 Draw out the pure water remaining inside the printhead. Disconnect the syringe tube and discharge the extracted water into the waste container (See Figure 4.2, left).
4.3 Return the damper to its original inlet and seat it securely. Remove the protective towels or cloth after liquid handling is complete (See Figure 4.2, right).


If you are not sure about any step, please contact the XINFLYING Technical Support Team for assistance.
© 2026 XINFLYING Technical Team. All rights reserved.
Do not reproduce or modify this document without permission.
For support, please contact: [email protected] | www.xin-flying.com