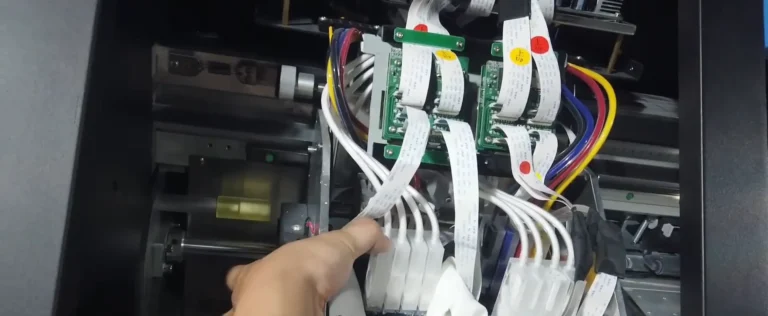
Remove residual ink, flush the printhead with a mixture of blue DTF cleaning solution and pure water, and finish with a pure water rinse. Protect the cable connections from liquid throughout the procedure.
Required items: Syringe with a short plastic tube, blue DTF cleaning solution, pure water, two paper towels or cloth pieces, and a container for waste liquid.
Step 1. Protect the Cables and Remove the Ink Damper
1.1 Position the carriage for access and switch off the printer before handling the printhead. Place two paper towels or cloth pieces over the ribbon cable connections to keep ink and cleaning liquid away from them. Put a waste container beneath the printhead (See Figure 1.1).
1.2 Lift the ink damper out of the printhead inlet, keeping its ink supply tube attached. This exposes the inlet for the syringe tube (See Figure 1.2).
Step 2. Draw Out the Remaining Ink
2.1 Attach the short tube to the syringe and connect its free end to the exposed printhead inlet. Gently pull back the plunger to draw out the ink remaining in the printhead (See Figure 2.1, left).
2.2 Disconnect the tube from the inlet and discharge the extracted ink into the waste container (See Figure 2.1, right).
Step 3. Prepare the Cleaning Mixture
3.1 Rinse the syringe with pure water to remove the extracted ink. Discharge the used rinse water into the waste container (See Figure 3.1, left).
3.2 Fill the syringe with equal amounts of blue DTF cleaning solution and pure water. The mixture is 50% cleaning solution and 50% pure water (See Figure 3.1, right).
Step 4. Flush with the Cleaning Mixture
4.1 Reconnect the syringe tube to the printhead inlet. Gently press the plunger to feed the mixed cleaning liquid through the printhead (See Figure 4.1).
4.2 Observe the liquid leaving the nozzle area beneath the printhead as you flush it. Let the waste container collect the liquid (See Figure 4.2, left).
4.3 Pull back the syringe plunger to extract the cleaning mixture remaining inside the printhead. Discharge the extracted liquid into the waste container (See Figure 4.2, right).
Step 5. Rinse with Pure Water
5.1 Fill the cleaned syringe with pure water and connect the tube to the same printhead inlet. Gently press the plunger to rinse the printhead (See Figure 5.1, left).
5.2 Observe the flow from the nozzle area again. If the spray pattern is incomplete, repeat the cleaning mixture flush and follow it with another pure water rinse (See Figure 5.1, right).
5.2 Restore the wiring: Reconnect all cables to their original positions. Check against the wiring photo and verify the positions of cables 1 and 2 (See Figure 5.2).
Step 6. Extract the Water and Reinstall the Ink Damper
6.1 Once the spray pattern is complete, pull back the syringe plunger to draw out the pure water remaining in the printhead. Disconnect the syringe tube and discharge the extracted water into the waste container (See Figure 6.1, left).
6.2 Reinsert the ink damper into its original printhead inlet and seat it securely. Remove the protective towels or cloth pieces after the liquid handling is complete (See Figure 6.1, right).