
Home Sensor Check & Replacement
Select Your Printer Model
(Default: Universal)
Choose your model from the drop-down menu below.
XINFLYING Home Sensor Check & Replacement
Applicable Model: Universal
Video Tutorial
Locate the home sensor near the carriage drive, check its installed position and wire connection, and replace it when required. Keep the new sensor in the original mounting position.
Applicable model: General. Required items: compatible replacement home sensor and screwdriver.
Step 1. Check the Sensor Position and Connection
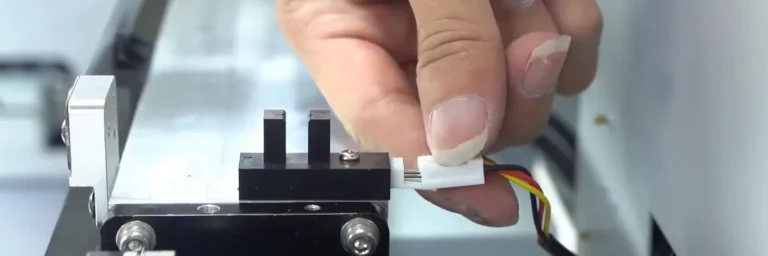
1.1 Switch off the printer before handling the sensor. Locate the fork-shaped home sensor on the bracket near the carriage drive. Note its position, slot alignment, and wire connection before removal (See Figure 1.1, left).
Step 2. Remove the Existing Sensor
2.1 Unplug the sensor wire by holding the connector body (See Figure 1.1, left).
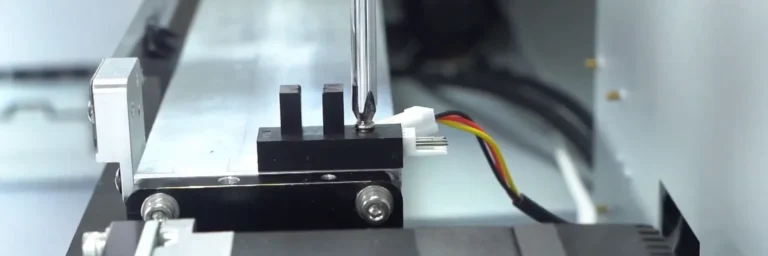
2.2 Remove the sensor fixing screw and lift the sensor from its bracket. Keep the screw for reuse (See Figure 1.1, right).
Step 3. Fit the Replacement and Reconnect the Wire
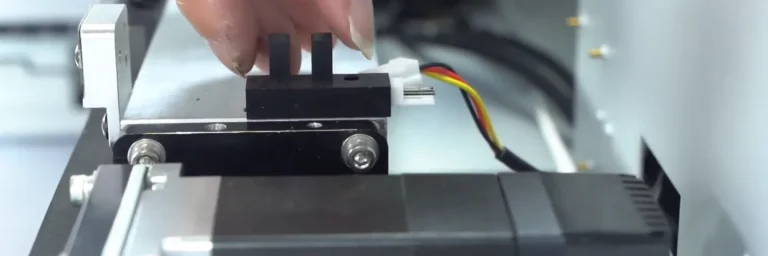
3.1 Place the compatible replacement sensor in the original position and secure it with the fixing screw (See Figure 2.1, left).
3.2 Reconnect the sensor plug. Check that the plug is fully seated and the sensor remains securely mounted in its original alignment (See Figure 2.1, right).

If you are not sure about any step, please contact the XINFLYING Technical Support Team for assistance.
© 2026 XINFLYING Technical Team. All rights reserved.
Do not reproduce or modify this document without permission.
For support, please contact: [email protected] | www.xin-flying.com