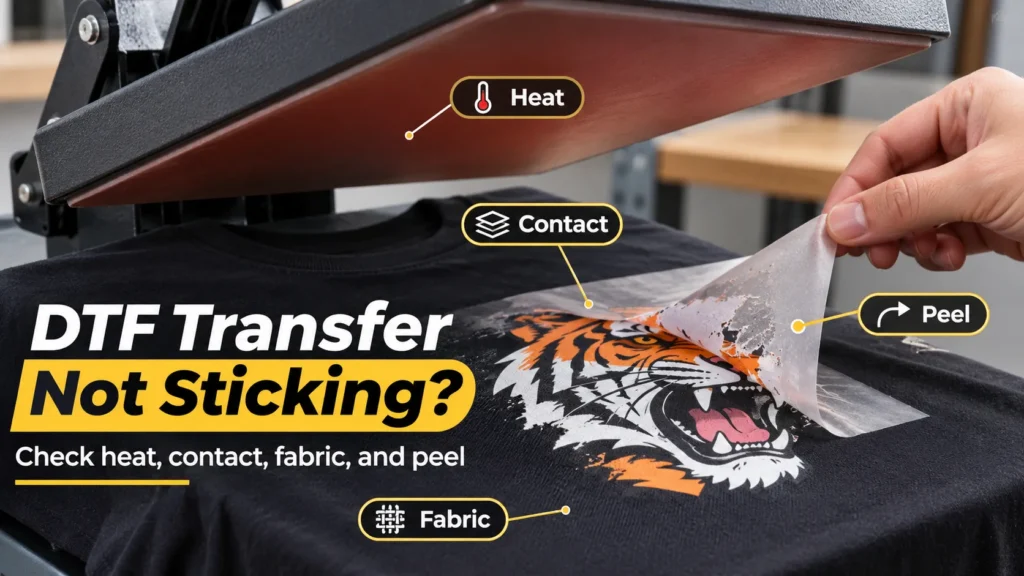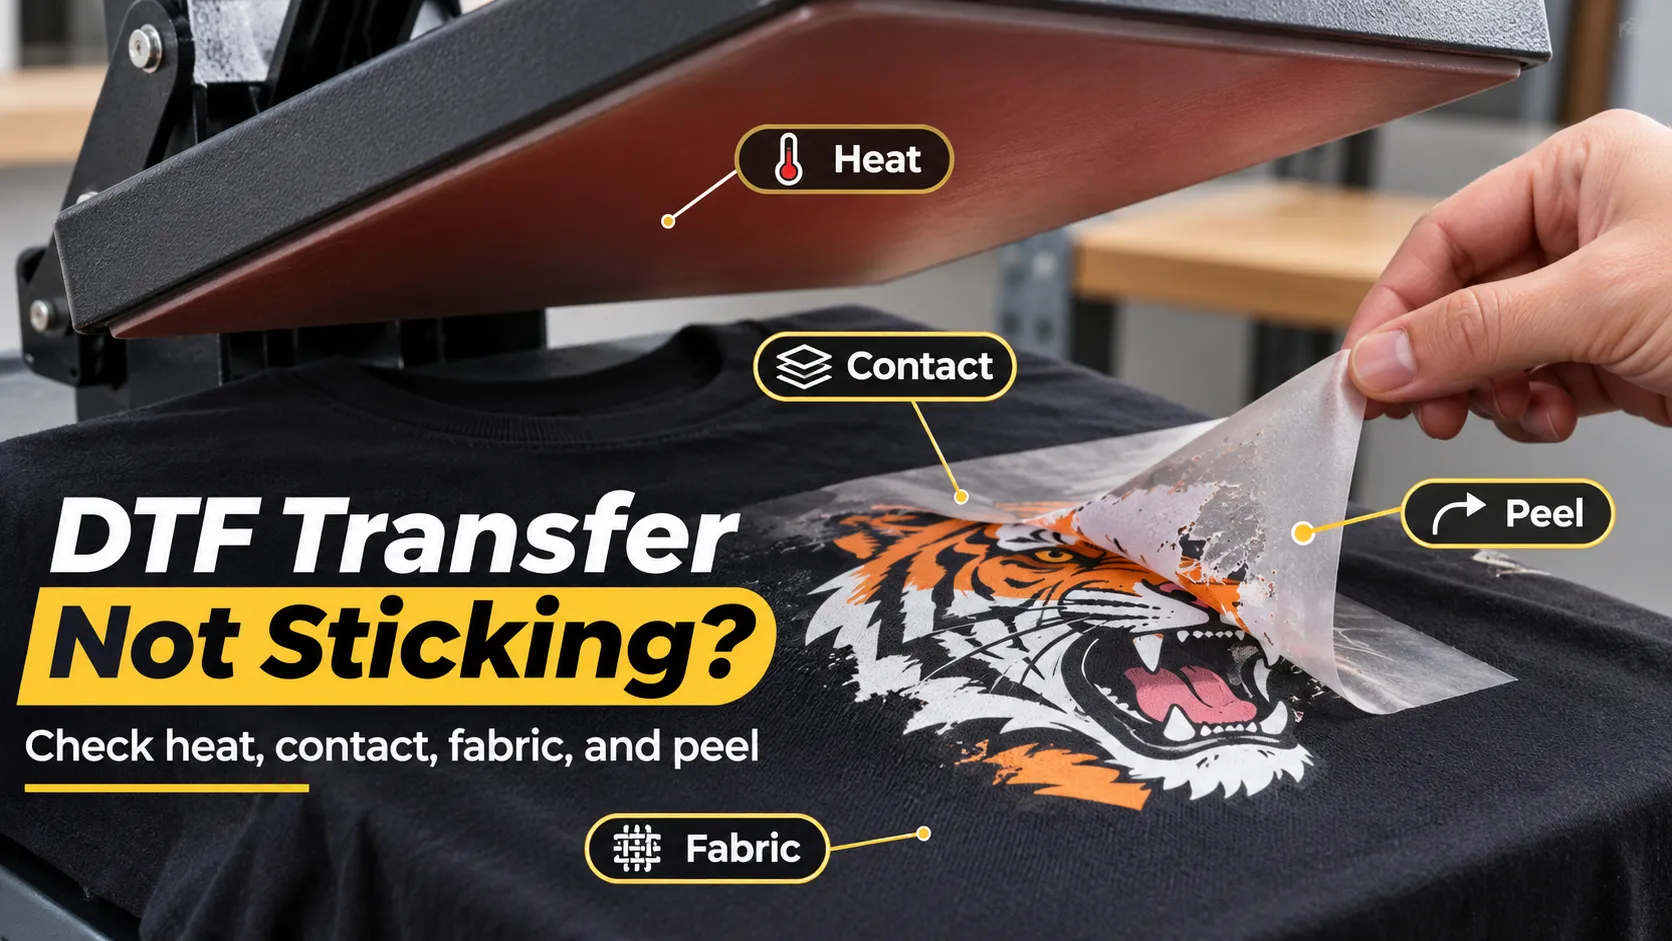
A DTF transfer usually fails to stick for one of five reasons. Heat isn’t reaching the adhesive evenly, pressure or contact is uneven, the garment surface is blocking the bond, the film is peeled in the wrong way, or the transfer itself was made or stored poorly. The fastest way to find which one applies is not to raise the temperature and press again.
Instead, answer two questions first: who made the transfer, and at what moment did it fail? Then change one thing at a time, within the instructions for that transfer, and compare the result with a recorded baseline. This guide walks through that process for both shops that print their own DTF transfers and shops that buy ready-to-press transfers.
Champ d'application : This guide covers garment DTF transfers applied with a heat press. UV DTF stickers are a separate no-heat product for hard surfaces, and their troubleshooting is different.
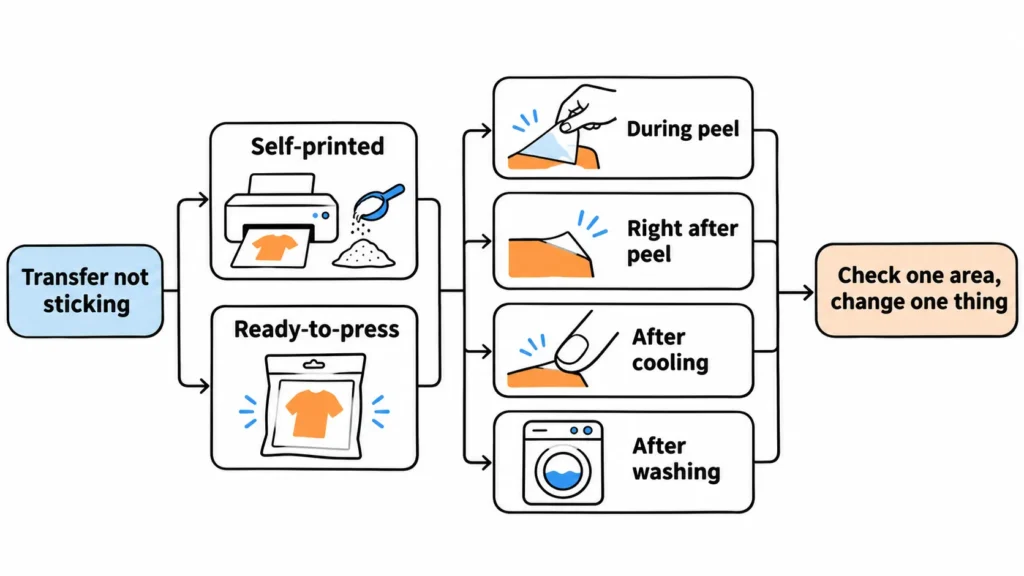
Start With Two Questions: Who Made the Transfer, and When Did It Fail?
Who made it decides how much of the process is yours to check. A DTF transfer goes through two separate heat stages. The first happens in production, when adhesive powder on the printed film is melted and cured. The second happens on the garment, when the heat press reactivates that adhesive and bonds it to the fabric.
If you print your own transfers, both stages are yours, so a failure can start at the printer and powder station as easily as at the press. If you buy ready-to-press transfers, production belongs to the supplier. Your job is to check application, garment, and storage, and to document anything that looks like a production defect. Don’t re-powder a finished transfer or borrow powder-curing settings from a printing guide; they belong to a different stage.
When it failed narrows the search. Most failures fall into one of these moments:
- During the peel: the design lifts with the carrier film.
- Right after the peel: the design transferred, but edges or one area are lifting.
- After cooling: the print looks fine, but a fingernail can lift an edge.
- After washing: the print held at first, then cracked, lifted, or flaked in the wash.
The failure moment points toward likely areas, but it doesn’t prove a cause. Before changing anything, find the instructions for that exact transfer or film. Note its temperature, time, pressure, peel type (hot or cold), and whether it calls for a finishing press. Every check below compares your process against those instructions.
DTF Transfer Not Sticking? Use This Diagnosis Table
The table connects what you see to the areas worth checking first. Read it as a starting order, not a verdict. The same symptom can come from more than one cause, so the “next check” column tells you how to find out.
| Ce que vous voyez | Areas to check first | Next check you can verify | Keep the same during the re-test | Stop testing when |
|---|---|---|---|---|
| Whole design lifts with the film | Heat reaching the adhesive, press time, peel type | Confirm actual platen temperature with the press maker’s method; confirm hot or cold peel on the transfer instructions | Same transfer batch, garment, and pressure | It still lifts at the top of the approved range |
| Center sticks, edges lift | Uneven pressure, platen heat at the edges, design placed near the platen edge | Center the design on the platen; check heat and contact at the edges | Same settings and garment | Edges fail in the same place on two presses or two garments |
| One zone fails near a collar, seam, pocket, or zipper | Contact blocked by garment structure | Reload the garment or use a pressing pillow so the print area sits flat | Same settings and transfer | The zone still fails with full, flat contact |
| Fine lines and small text fall off | Small adhesive area, powder coverage, contact | Inspect the back of an unused transfer from the same batch; repeat on a flat, smooth test garment | Same settings | Fine details fail on a smooth garment too |
| Looks fine after peeling, lifts after cooling | Incomplete bond: heat, time, pressure, or surface contamination | Pre-press and lint-roll; repeat with the documented baseline | Same transfer and press | Two careful repeats give the same result |
| Fails only on a new garment style | Fabric fiber, coating, texture, or softener residue | Press the same transfer on a garment that has worked before | Same transfer, press, and settings | It works on the old garment but not the new one: treat it as a compatibility issue |
| Only some pieces in one batch fail | Press consistency, loading, or variation inside the transfer batch | Compare failed and good pieces: position on platen, operator, transfer sheet | Same garment and settings | Failures follow specific transfer sheets rather than the press |
| Prints fail after washing | Weak initial bond, or care that’s too harsh | Review the first-press record; check the care instructions given to the customer | Same production process for the next test piece | A properly pressed test piece also fails after normal care |
The value of the table is in the middle columns. “It’s peeling” can mean low heat, a blocked seam, a cold-peel film pulled hot, or coated fabric. Checking one area while holding everything else steady tells you which explanation survives. That is far cheaper than ruining garments with bigger temperature jumps.
Check the Heat That Actually Reaches the Adhesive
The temperature on the display is not proof that the whole platen is at that temperature. Heating elements wear, controllers drift, and some areas of a platen can run cooler than others, especially near the edges. A cool zone can leave the adhesive under-melted there while the rest of the design bonds.
Check the platen with the method your heat press manufacturer supports, and look at several points, not only the center. A heat gun is a tool for blowing hot air, not a thermometer, so it can’t verify platen temperature. Infrared readings are also affected by the surface being measured, so treat them as a rough indication rather than a calibration.
Low heat or a short press time keeps the adhesive from fully melting into the fibers. Too much heat creates a different set of problems, such as scorched fabric, damaged film, or dye migration on some polyester. Don’t keep raising the temperature beyond the range approved for that transfer to force a bond. If the press is accurate and the transfer still fails at the top of its range, the cause is probably elsewhere. For press types, settings by fabric, and how to read a transfer’s spec sheet, see our heat press settings guide for DTF printing.
Check Pressure and Contact Across the Whole Design
DTF adhesive needs firm, even contact over every part of the design for the full press time. Where the platen doesn’t press, the adhesive has nothing to grip. This is why a print can bond perfectly in the center and lift along one side.
Garment structure is the most common contact problem. Seams, zippers, collars, pockets, and thick hems lift the platen so that some areas get heavy pressure and others barely touch. Move the design, reposition the garment, or use a pressing pillow or pad so the print area sits higher than the obstruction. Hoodies are a frequent example; our guide to pressing DTF on hoodies around pockets, seams, and zippers shows how to load them.
The press itself can also cause uneven contact. An uneven or worn platen, a damaged lower pad, or a pressure adjustment that has slipped will all leave weak spots. Note that a handle that’s hard to close doesn’t prove pressure is even across the platen. Manual, pneumatic, and hydraulic presses also express pressure differently, so a setting written for one type doesn’t transfer directly to another. A household iron can’t provide even heat and steady pressure over a full design, so it’s a poor choice for DTF.
Check the Garment Surface
The adhesive bonds to fibers, so anything sitting on those fibers weakens the bond. Moisture is the most familiar example. Cotton holds humidity, and a short pre-press, as directed for your transfer, drives it out and flattens wrinkles. Lint, dust, and loose fibers create tiny gaps, so lint-roll the print area before placing the transfer.
Some surfaces resist adhesion by design. Water-repellent finishes, some coatings, and fabric softener residue can interfere with bonding. Textured fabrics such as terry cloth, corduroy, waffle knits, ribbing, and heavy knits have ridges and gaps that the platen can’t press flat. On these garments, test before production and expect that some may not suit standard DTF transfers.
Fiber content matters too. Polyester and heat-sensitive blends often need settings at the lower end of the approved range. Check the test piece for scorching, shine, and dye migration as well as adhesion. If a transfer works on one blank and fails on another, start by treating it as a compatibility problem. Changing the press process may not fix a coating or texture issue. Test unfamiliar fabrics such as nylon, coated materials, or leather against the transfer maker’s guidance before running an order.
Check the Peel Method Against the Film
Hot peel and cold peel are properties of the film or transfer, not a preference. A hot-peel transfer is designed to release the carrier while it’s still hot. A cold-peel transfer needs the adhesive to cool and set first. Peeling at the wrong stage can pull the design off the garment or leave it incomplete.
Confirm the peel type on the transfer’s packaging or the supplier’s instructions; don’t assume from a previous order or another brand. Peel smoothly and evenly in one motion. If the design starts to lift with the film, stop rather than forcing it.
Lifting during the peel doesn’t automatically mean you should switch peel methods. A hot-peel transfer that lifts may be telling you the heat, pressure, or garment contact is wrong. A finishing press after peeling is also product-specific. Some transfers call for it, while others list it as optional, so follow the instructions rather than treating it as a universal fix.
If You Print Your Own DTF Transfers, Check Production First
Self-printed transfers add a full production stage to the list. A transfer that left the curing step with a weak adhesive layer won’t be rescued at the heat press. Check these points on unused transfers from the same run before blaming the press:
- Ink, film, and powder that work together. Use a combination your printer and consumables suppliers support, with enough white ink coverage under the color layer for the powder to hold.
- Even powder coverage. Hand powdering can leave thin or bare patches, and those areas have no adhesive to bond. Thin lines, small text, and scattered details carry very little adhesive in the first place, so coverage problems show there first.
- Correct powder curing. Under-melted powder stays grainy and doesn’t bond well; over-curing creates its own defects. Follow the powder and curing equipment instructions for this stage. Don’t reuse garment pressing settings here, or curing settings at the press.
- Storage. Humidity, heat, sunlight, dust, and creasing degrade the adhesive layer on finished transfers and on powder and film. Store them clean, flat, dry, and away from heat, and label each batch so a failure can be traced.
If your powder shaker or dryer has a mechanical fault, solve that before re-testing adhesion. Our DTF dryer not heating guide covers one common fault. For the full production workflow, see how to print DTF transfers. If you’re reviewing your film, powder, and ink combination, our DTF printer supplies page lists the consumables we offer.
If You Bought Ready-to-Press DTF Transfers
With ready-to-press transfers, the supplier’s instructions are the standard for that product. Settings, peel type, and finishing press rules differ between suppliers. For example, DTF Dallas describes its current standard garment transfers as hot peel and lists its finishing press as optional. That applies to their transfers, not to every product on the market.
Inspect transfers when they arrive and again before pressing. Look for visible damage, missing areas of the design, contamination, or unusual adhesive coverage. A finished ready-to-press transfer shouldn’t shed loose powder from its back.
If several transfers from one batch fail on a garment and press that have worked before, stop using the rest of that batch. Photograph the transfers and the failed pieces, and keep the unused sheets. Choosing and evaluating a supplier is covered in how to choose a reliable DTF transfer supplier.
Run a Controlled Re-Test Instead of Guessing
Random adjustments hide the cause. If you raise heat, add time, and change garments at once, a good result can’t tell you which change worked. A bad result wastes three variables. A controlled re-test uses a written baseline and changes one condition at a time.
Start by recording the baseline for the failed piece:
| Record this | Example of what to write |
|---|---|
| Transfer source and batch | Self-printed, film roll and powder lot; or supplier name and order number |
| Garment | Brand, style, fiber content, color, any finish listed on the label |
| Presse | Type (manual, pneumatic, hydraulic) and model |
| Settings | Set temperature, time, pressure setting, and how actual temperature was checked |
| Préparation | Pre-press time, lint-rolling, cover sheet used |
| Peel | Hot or cold, and how long after opening the press |
| Résultat | Failure moment, location on the design, photos |
Then follow a few rules. Test on spare garments of the same style, or an area that won’t be sold. Change one variable per test, and keep it within the range the transfer or film instructions allow. Repeat a result at least once before trusting it, because one good press can be luck. Write the result down before deciding the next step.
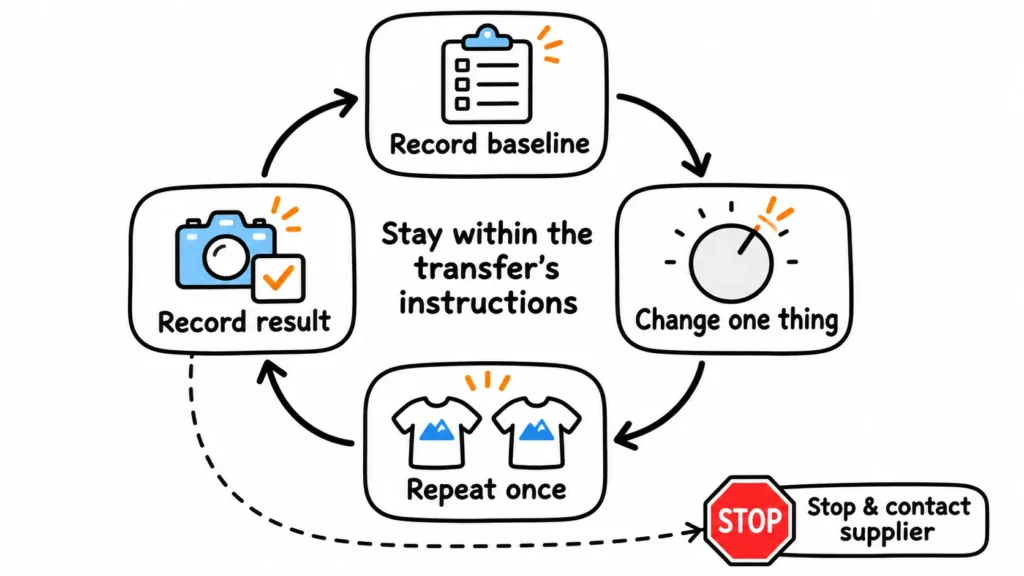
Know when to stop. Stop adjusting and escalate when any of these happen:
- The transfer still fails after you’ve worked through the approved range and confirmed full contact.
- The same batch fails on two different presses or on a garment that has worked before.
- The test garment scorches, shines, or shows dye migration before the transfer bonds.
- Fixing one symptom creates another, such as better adhesion but a stiff, glossy print.
A failed piece may or may not be recoverable. A re-press can sometimes help a print that bonded weakly, as long as the film wasn’t torn away mid-peel. Results vary, though, and the transfer instructions decide whether a re-press is allowed. Don’t assume every failed piece can be saved, and don’t assume every one must be scrapped.
Wash Failure: Weak First Bond or Harsh Care?
A print that peels after washing usually didn’t bond fully when it was pressed. Harsh care can also shorten its life. Check your first-press record before blaming the customer. If the baseline shows low contact, a cool platen, or an untreated coating, fix the application first.
Care still matters once the bond is good. Follow the transfer maker’s care advice, which commonly includes waiting before the first wash, washing inside out, and avoiding fabric softener and high dryer heat. Avoid promising a specific number of washes unless you have test records for that transfer and garment.
When to Stop Testing and Contact the Supplier
Don’t use a full order as your test run. Once the stop conditions above are met, send the supplier evidence instead of more trial garments. The baseline record makes this quick, and it helps the supplier separate a product issue from an application issue.
À inclure :
- Order or batch number, and photos of unused transfers front and back
- Garment brand, style, and fiber content
- Press type and model, settings, and how temperature was checked
- The failure moment and location on the design
- What you changed in your re-tests and what happened each time
- Photos of the failed pieces
For self-printed transfers, the same record helps whoever supports your printer and consumables. It shows whether to look at powder coverage, curing, storage, or the press.
Foire aux questions
Les causes les plus courantes sont une chaleur insuffisante au niveau de l'adhésif, un contact irrégulier ou une méthode de décollement inadaptée au film. Vérifiez s'il s'agit d'un décollement à chaud ou à froid. Vérifiez ensuite la température réelle du plateau et le contact avant de modifier les réglages.
Parfois. Un imprimé dont l'adhérence est insuffisante peut être amélioré en le repassant sous une feuille de protection, si les instructions de transfert le permettent. Un motif qui s'est déchiré lors du décollage ne peut généralement pas être entièrement réparé.
Uniquement dans la plage autorisée pour ce transfert, et uniquement après avoir vérifié la température réelle du plateau. Si la presse est précise, examinez ensuite la pression, le contact, la surface du vêtement et la méthode de décollement. Une chaleur plus intense risque de brûler le tissu sans résoudre la cause réelle du problème.
Le polyester nécessite souvent des réglages plus bas, et certains t-shirts de sport sont dotés de finitions hydrofuges ou d’autres traitements qui peuvent nuire à l’adhérence. Effectuez un test à la limite inférieure de la plage autorisée. Vérifiez s’il y a migration de la teinture et comparez le résultat avec un échantillon vierge en polyester qui a déjà donné de bons résultats.
It isn’t recommended. An iron can’t hold even heat and steady pressure across a whole design, which is exactly what a DTF bond needs.
No. Some transfers specify a finishing press, while others list it as optional. Follow the instructions for your transfer, and don’t treat a second press as the cure for a weak first press.