
Replace Decoder Card
Select Your Printer Model
(Default: Universal)
Choose your model from the drop-down menu below.
XINFLYING Replace Decoder Card
Applicable Model: Universal
Video Tutorial
Replace the decoder card on the carriage, transfer the original SD card, and restore the labeled ribbon cable connections. Finish by checking the card indicators and printing a nozzle test.
Applicable model: General. Required items: compatible decoder card, screwdriver, phone for recording connections, and antistatic protection.
Step 1. Prepare and Expose the Carriage
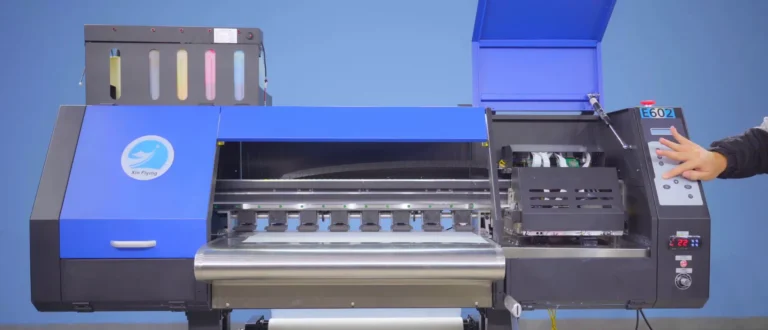
1.1 Open the service covers and use the carriage controls to move the carriage to the middle of its travel (See Figure 1.1, left).
1.2 Switch off and disconnect the printer before removing covers or handling circuit boards. Use antistatic protection when handling the decoder card.
1.3 Remove the carriage housing and the headboard cover. Keep the covers and their fixing screws for reassembly (See Figure 1.1, right).

1.4 Photograph the decoder card, SD card orientation, and each ribbon cable connection. Preserve the cable labels so each cable can be returned to its original socket.
Step 2. Remove the Card and Transfer the SD Card
2.1 Disconnect the ribbon cables from the decoder card. Keep the cables in order and avoid folding or pulling their conductors (See Figure 2.1, left).
2.2 Remove the decoder card fixing screws and lift the card from its mounting position (See Figure 2.1, right).


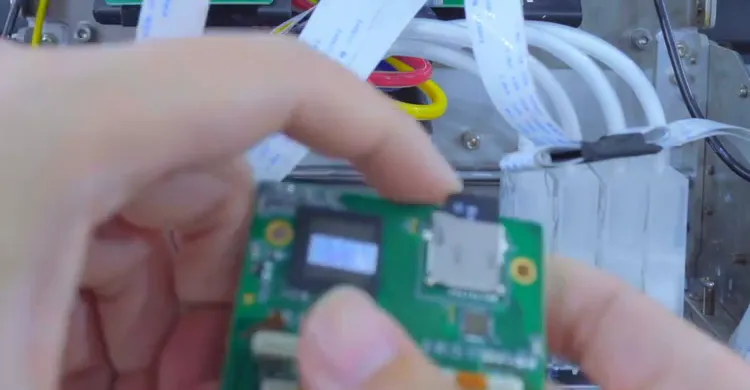
2.3 Remove the SD card from the old decoder card and retain it for the replacement (See Figure 2.2, left).
2.4 Remove the shipping packaging and protective films from the new decoder card. Insert the retained SD card into its corresponding slot, matching the original orientation (See Figure 2.2, right).

Step 3. Install the Card and Reconnect the Cables
3.1 Check that the protective films have been removed from the replacement card before mounting it (See Figure 3.1, left).
3.2 Place the replacement card in the original mounting position and secure its fixing screws (See Figure 3.1, right).
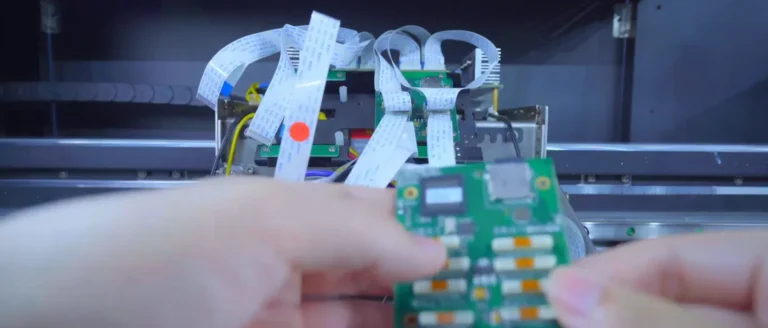

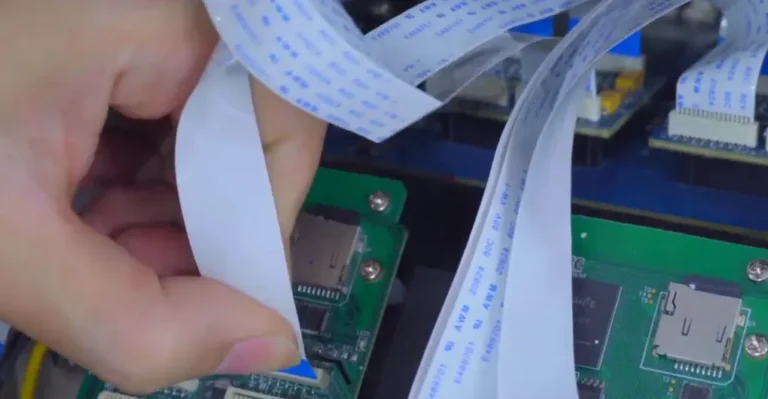
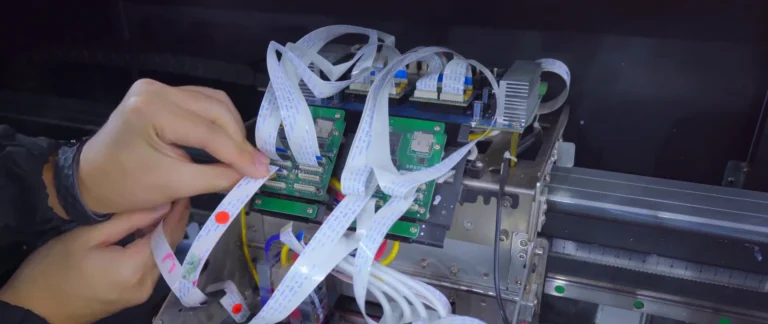
3.3 Reconnect the headboard ribbon cables to the decoder card according to their labels and matching socket positions. Match each position individually, such as the cable labeled for the left upper connection (See Figure 3.2, left).
3.4 Reconnect the printhead ribbon cables in the same way. Match the cable labels and original contact orientation; do not interchange connections (See Figure 3.2, right).
Step 4. Check the Connections and Refit the Covers
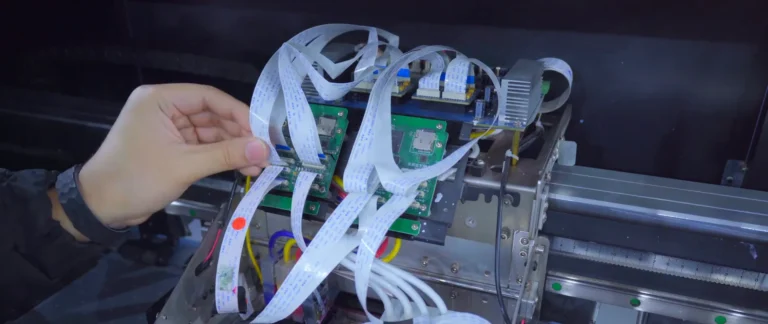
4.1 Recheck every connection with the power disconnected. If a ribbon cable is not fully seated, remove and reinsert it straight into the socket (See Figure 4.1, left).
4.2 Clear tools from the carriage, then briefly power on the printer to observe the decoder card without touching it. Both indicator lights on the illustrated card should illuminate (See Figure 4.1, right).
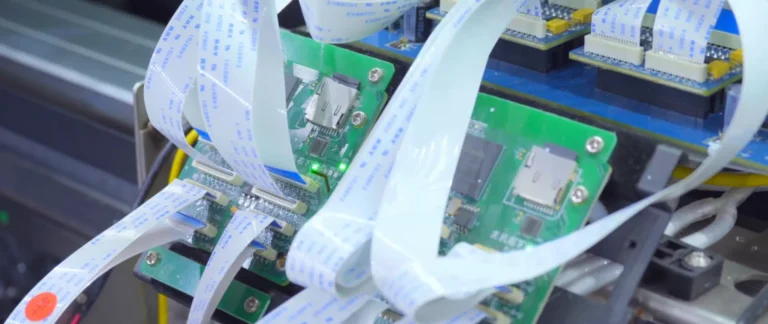
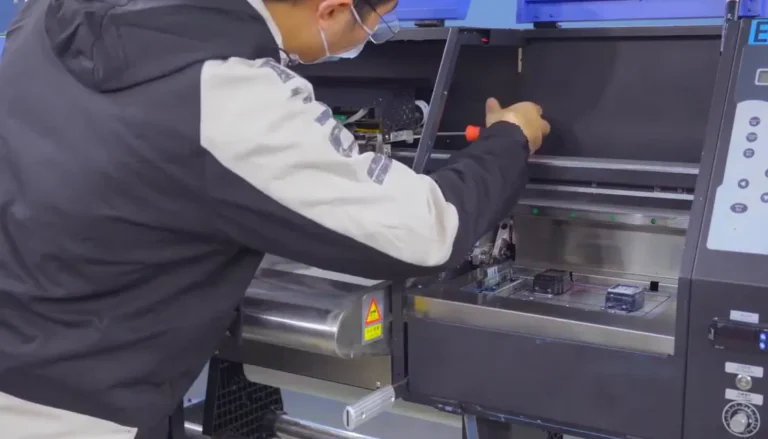
4.3 Switch off and disconnect power again before refitting the headboard cover and carriage housing. Secure their original screws and keep cables clear of the cover edges (See Figure 4.2).

Step 5. Return Home and Print a Nozzle Test
5.1 Power on the printer and return the carriage to its original position using the printer controls (See Figure 5.1, left).
5.2 Connect the printer to the computer and run the Weak Clean command in the printer software (See Figure 5.1, right).


5.3 Print a nozzle test after cleaning (See Figure 5.2, left).
5.4 Inspect the printed pattern to confirm that the printheads discharge ink. If the test does not print normally, stop and have the card compatibility and cable connections checked before further use (See Figure 5.2, right).


If you are not sure about any step, please contact the XINFLYING Technical Support Team for assistance.
© 2026 XINFLYING Technical Team. All rights reserved.
Do not reproduce or modify this document without permission.
For support, please contact: [email protected] | www.xin-flying.com